Create Instance
1. Choose EC2
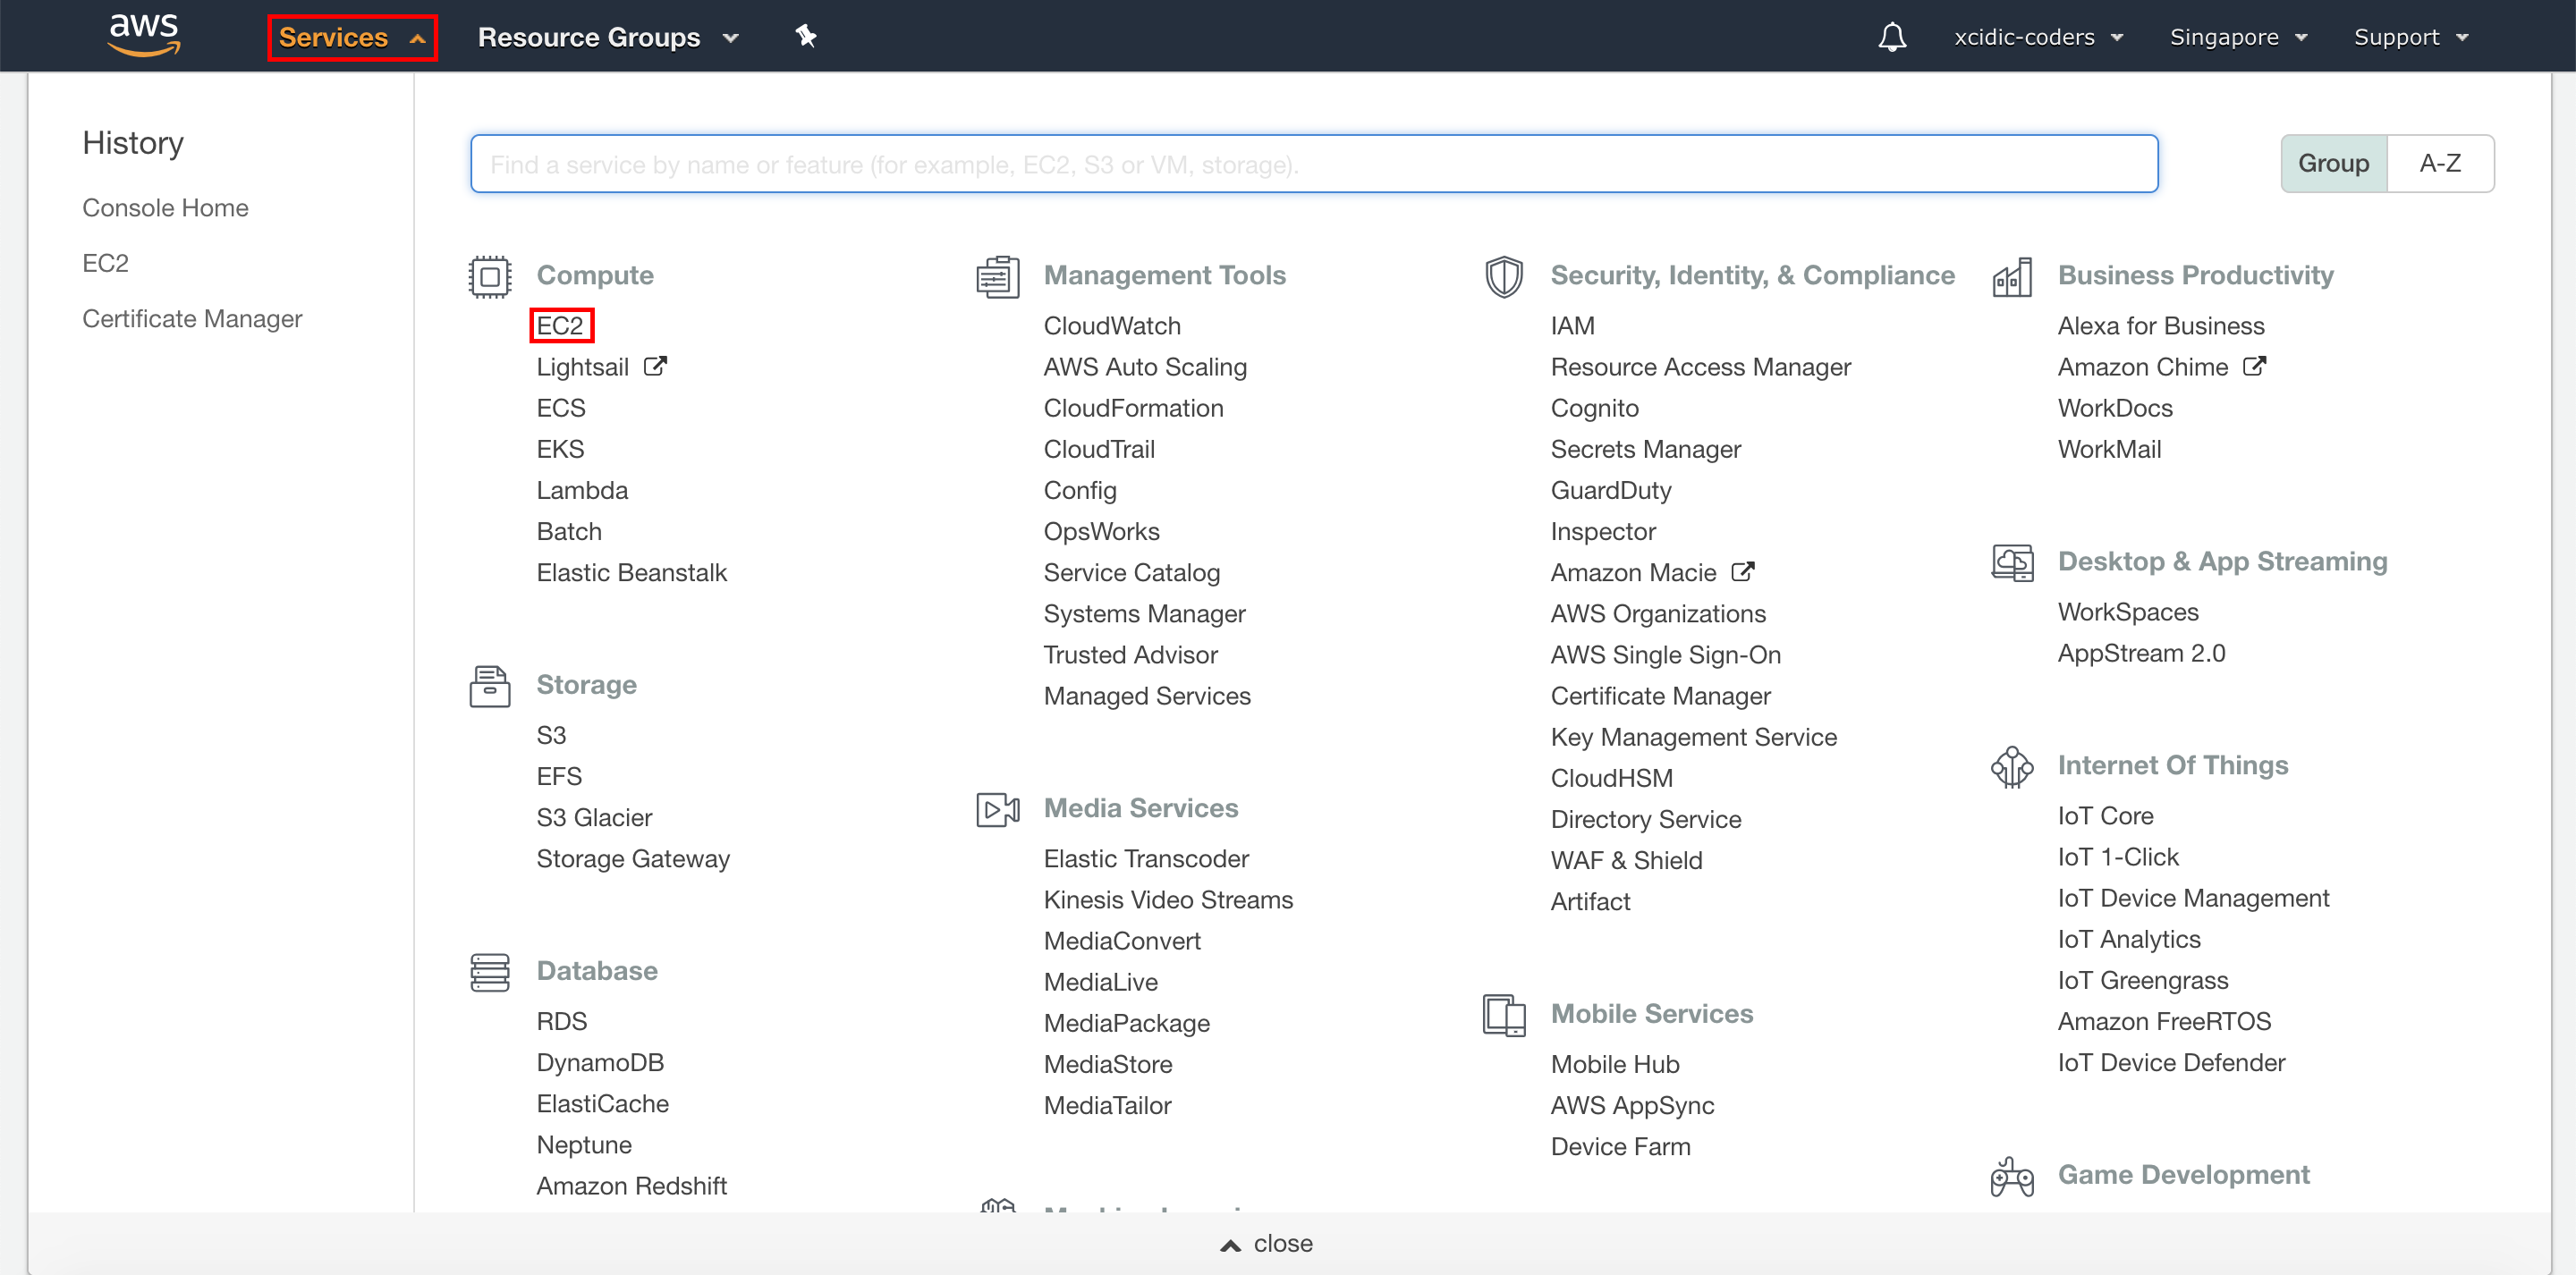
After Sign In success, click menu “Service” on header, then click “EC2”.
2. Create Instance
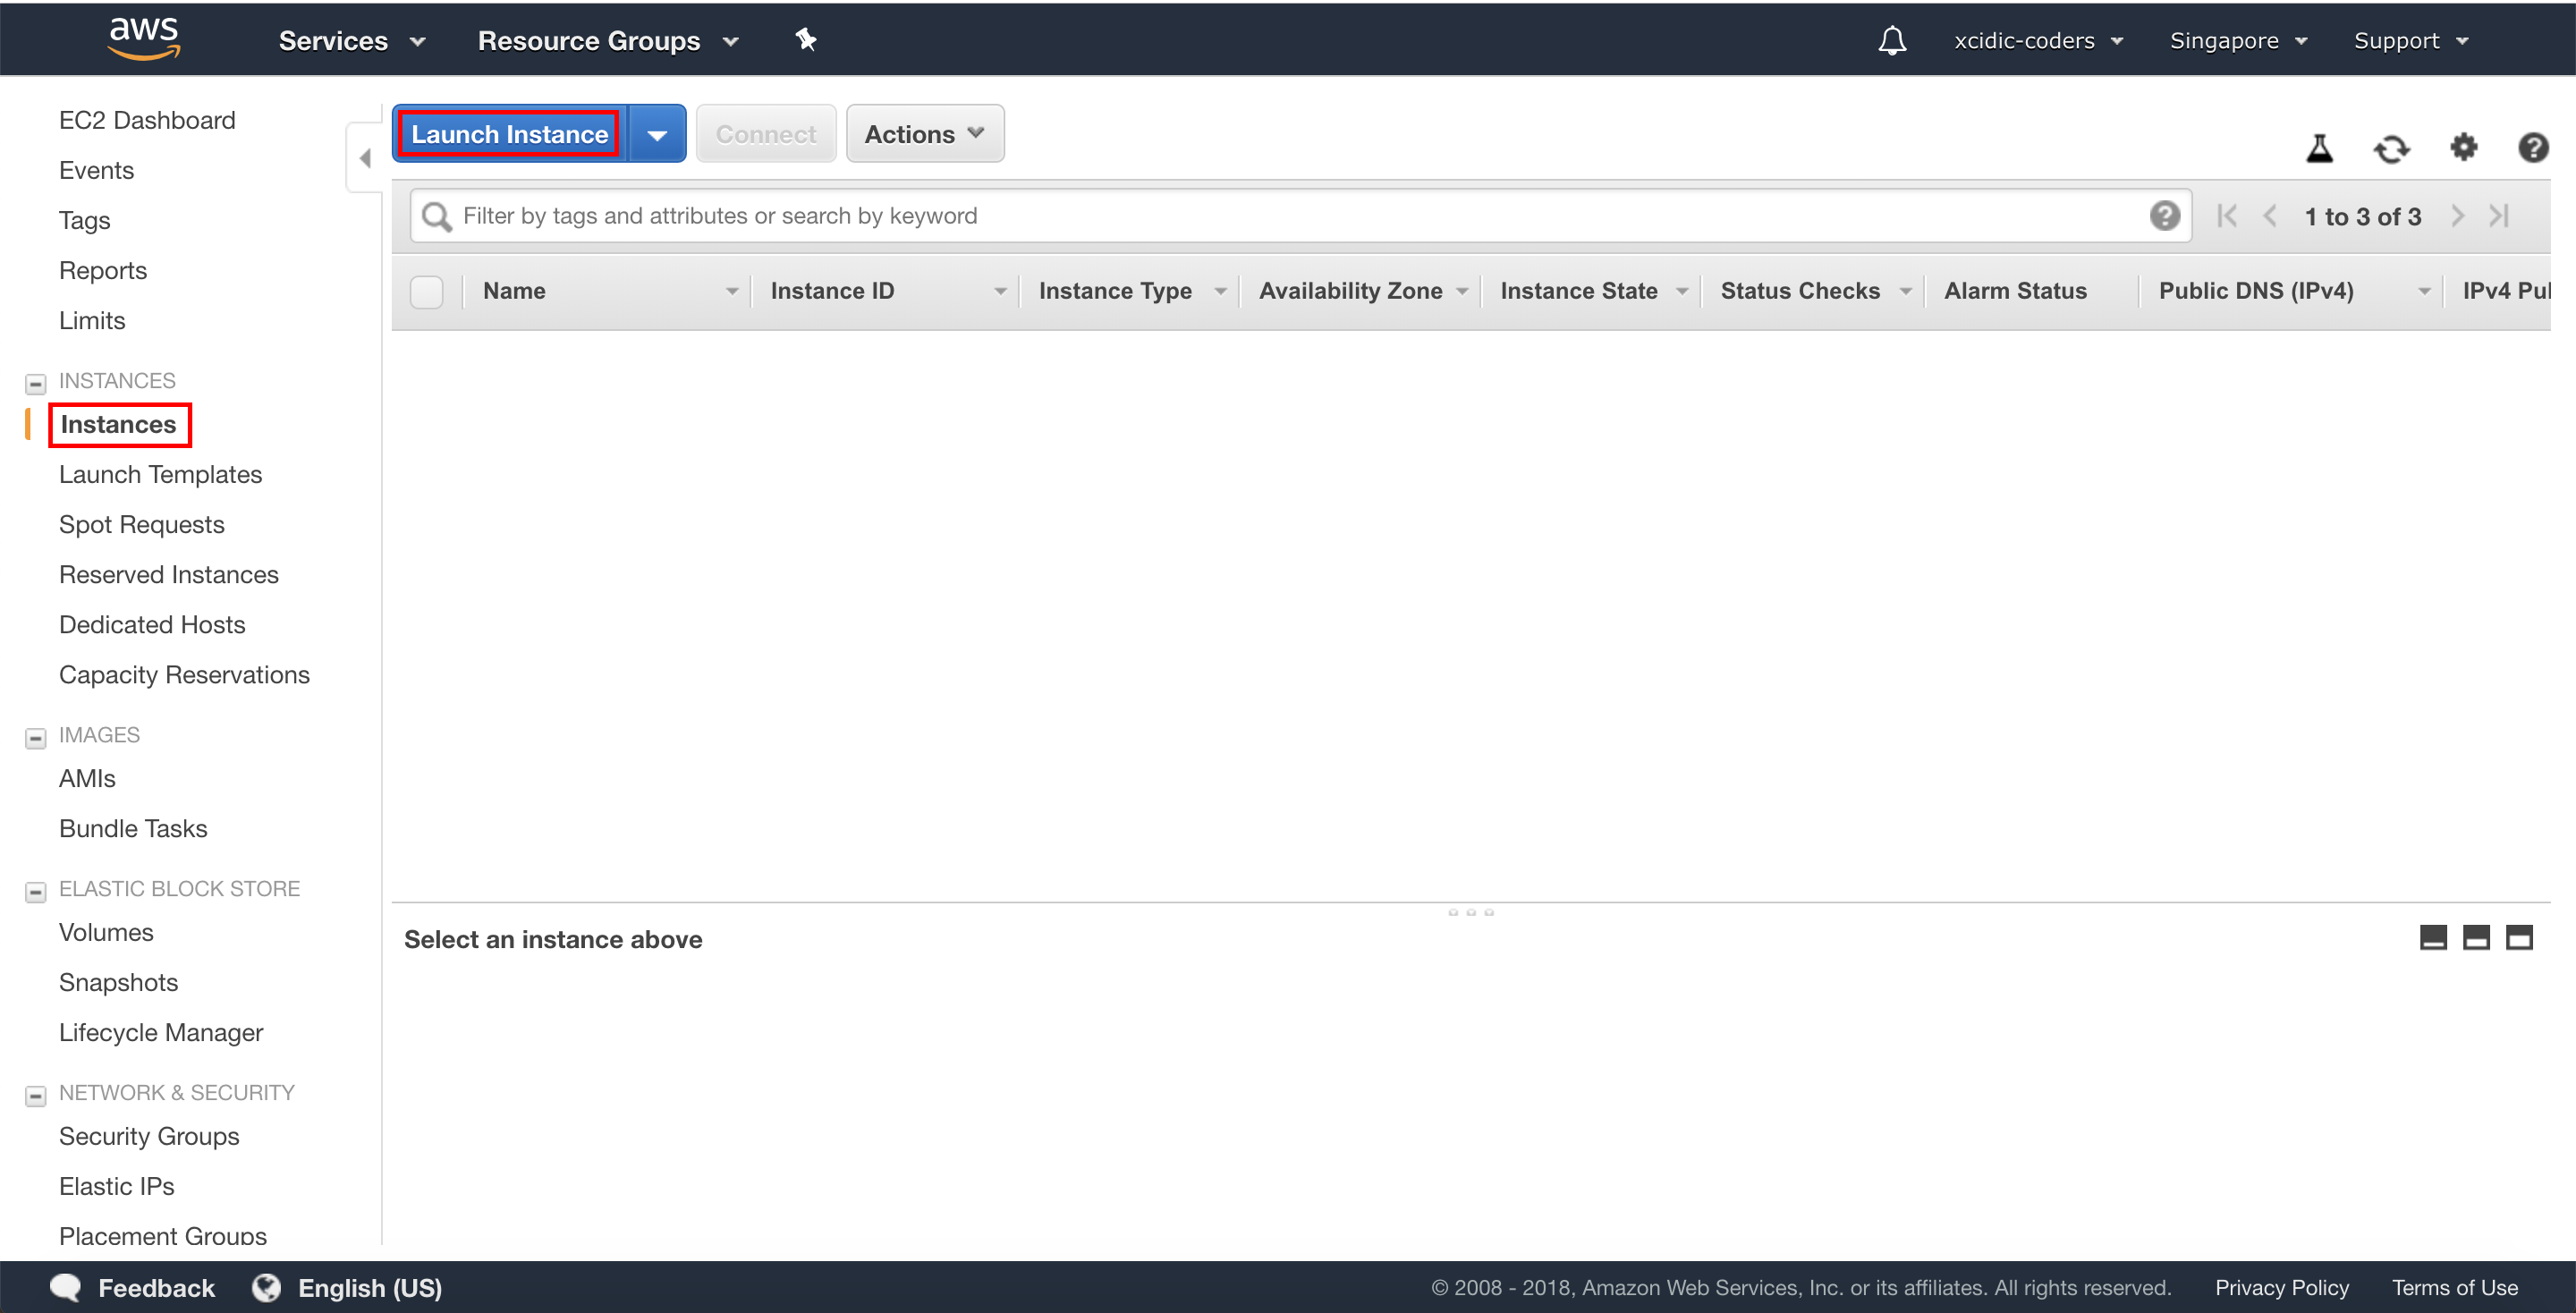
After click EC2, click “Instances” on left menu, then click “Launch Instance” button to create a new instance.
3. Choose Operation System
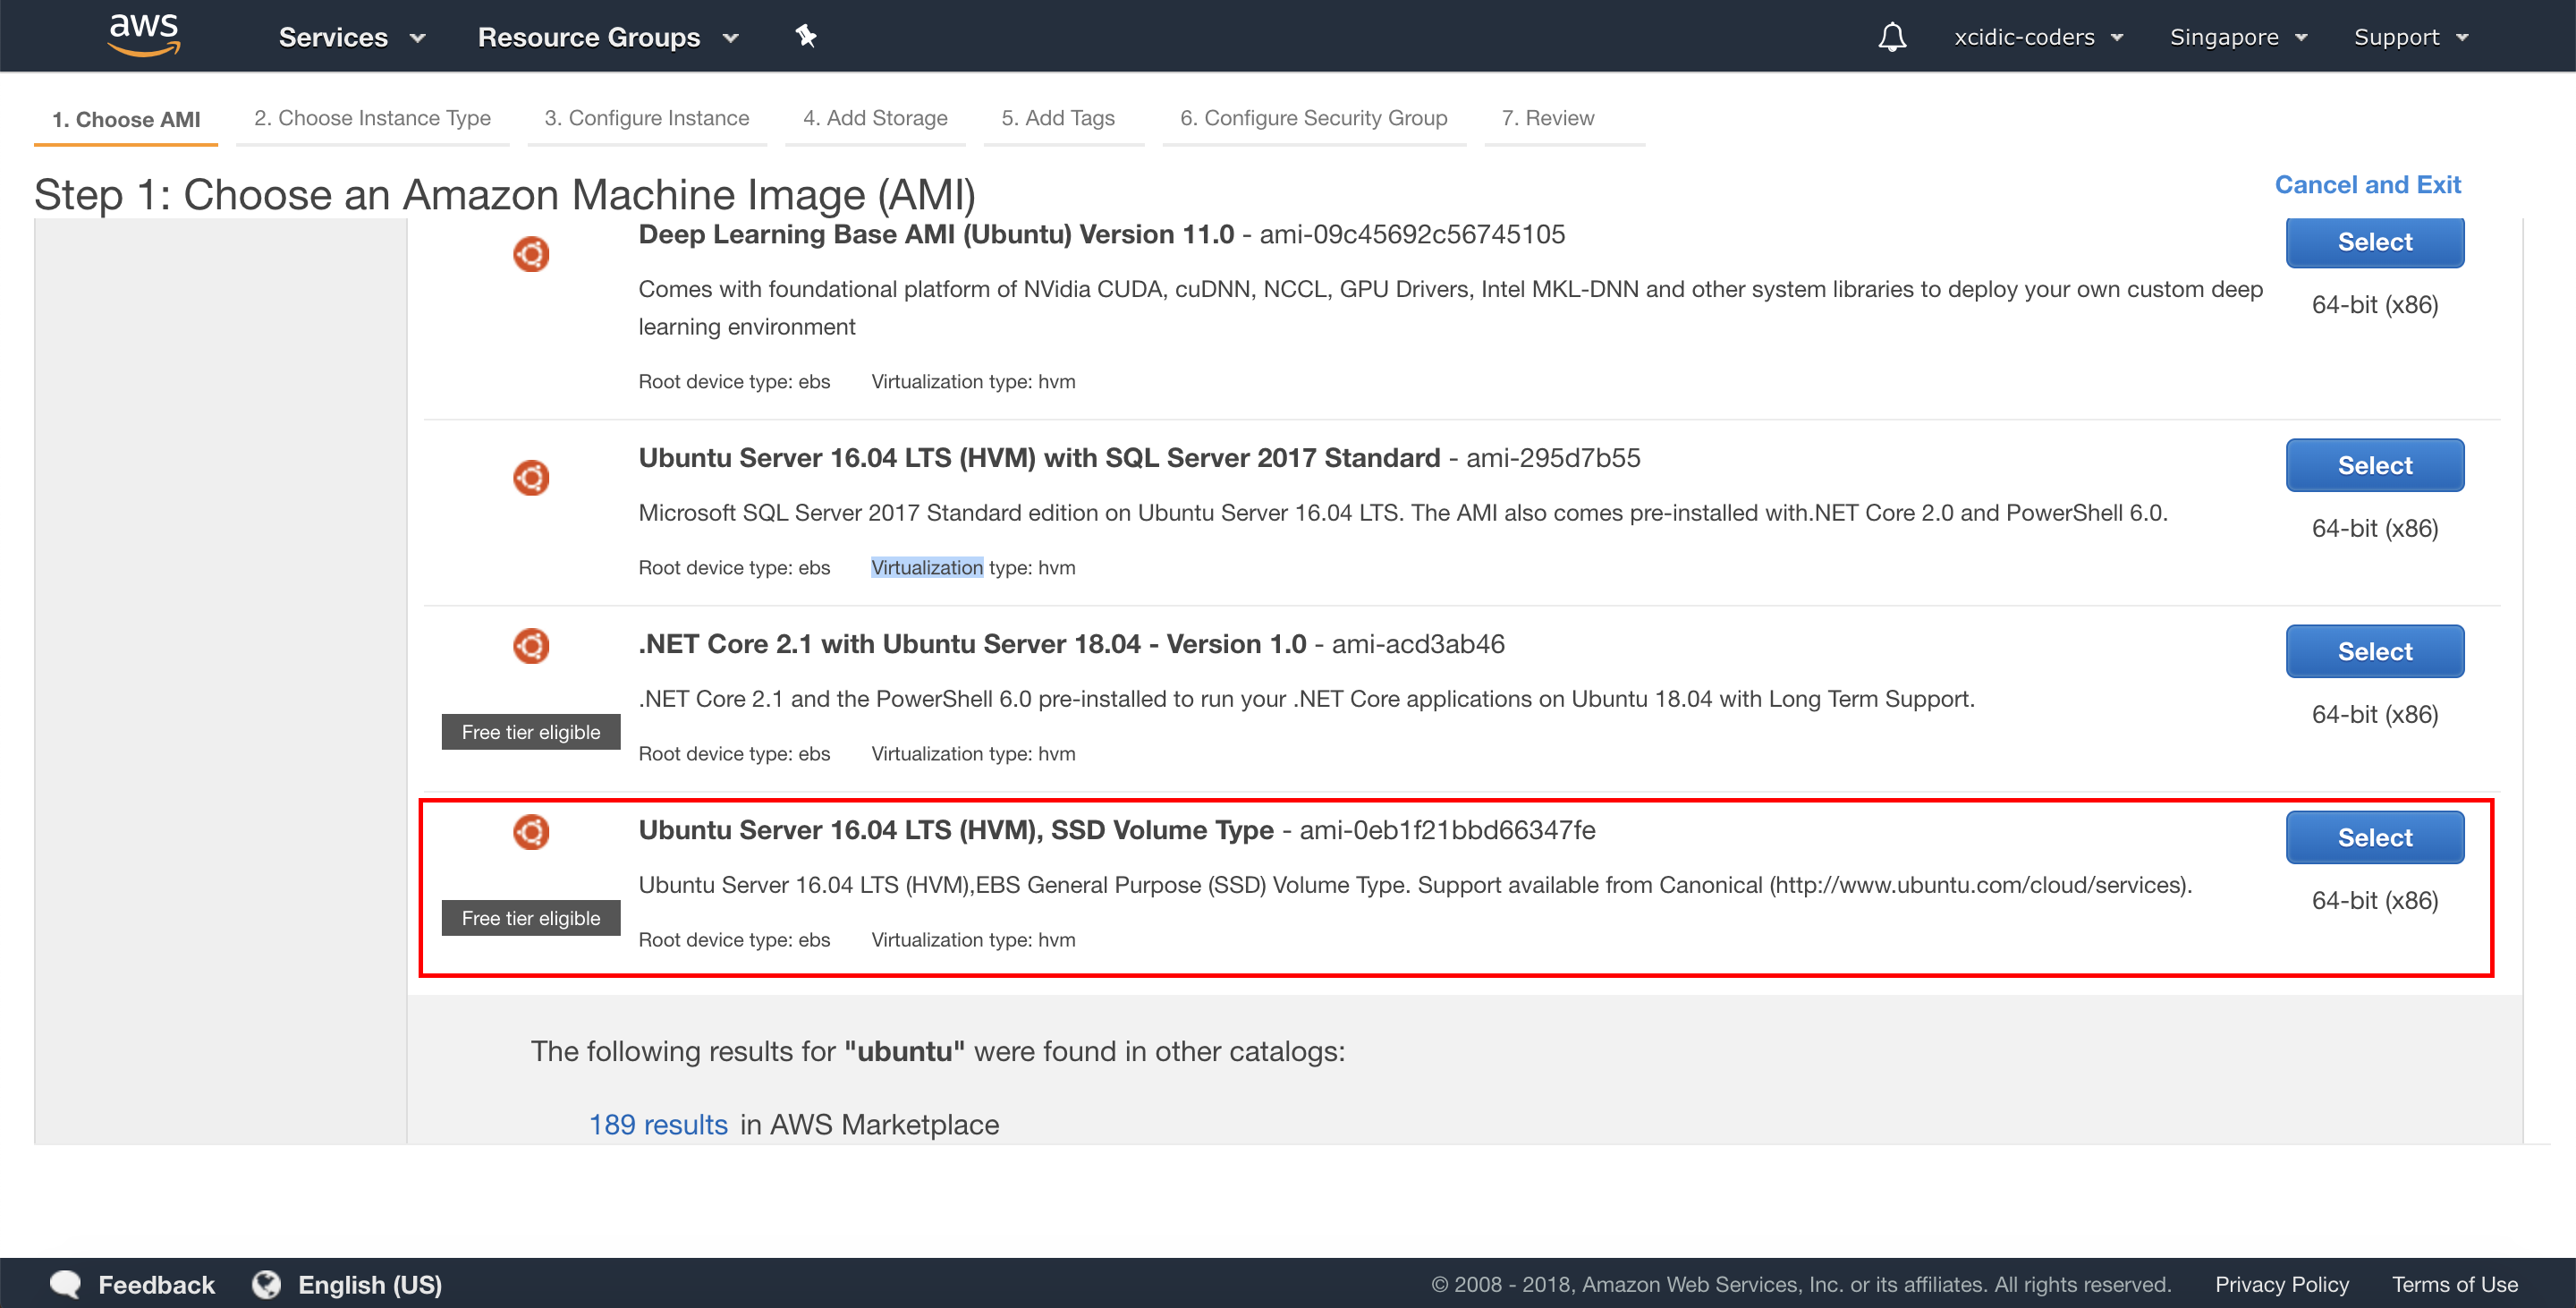
Choose the Operation System (OS), for Xcidic we choose “Ubuntu Server 16.04 LTS (HVM), SSD Volume Type”.
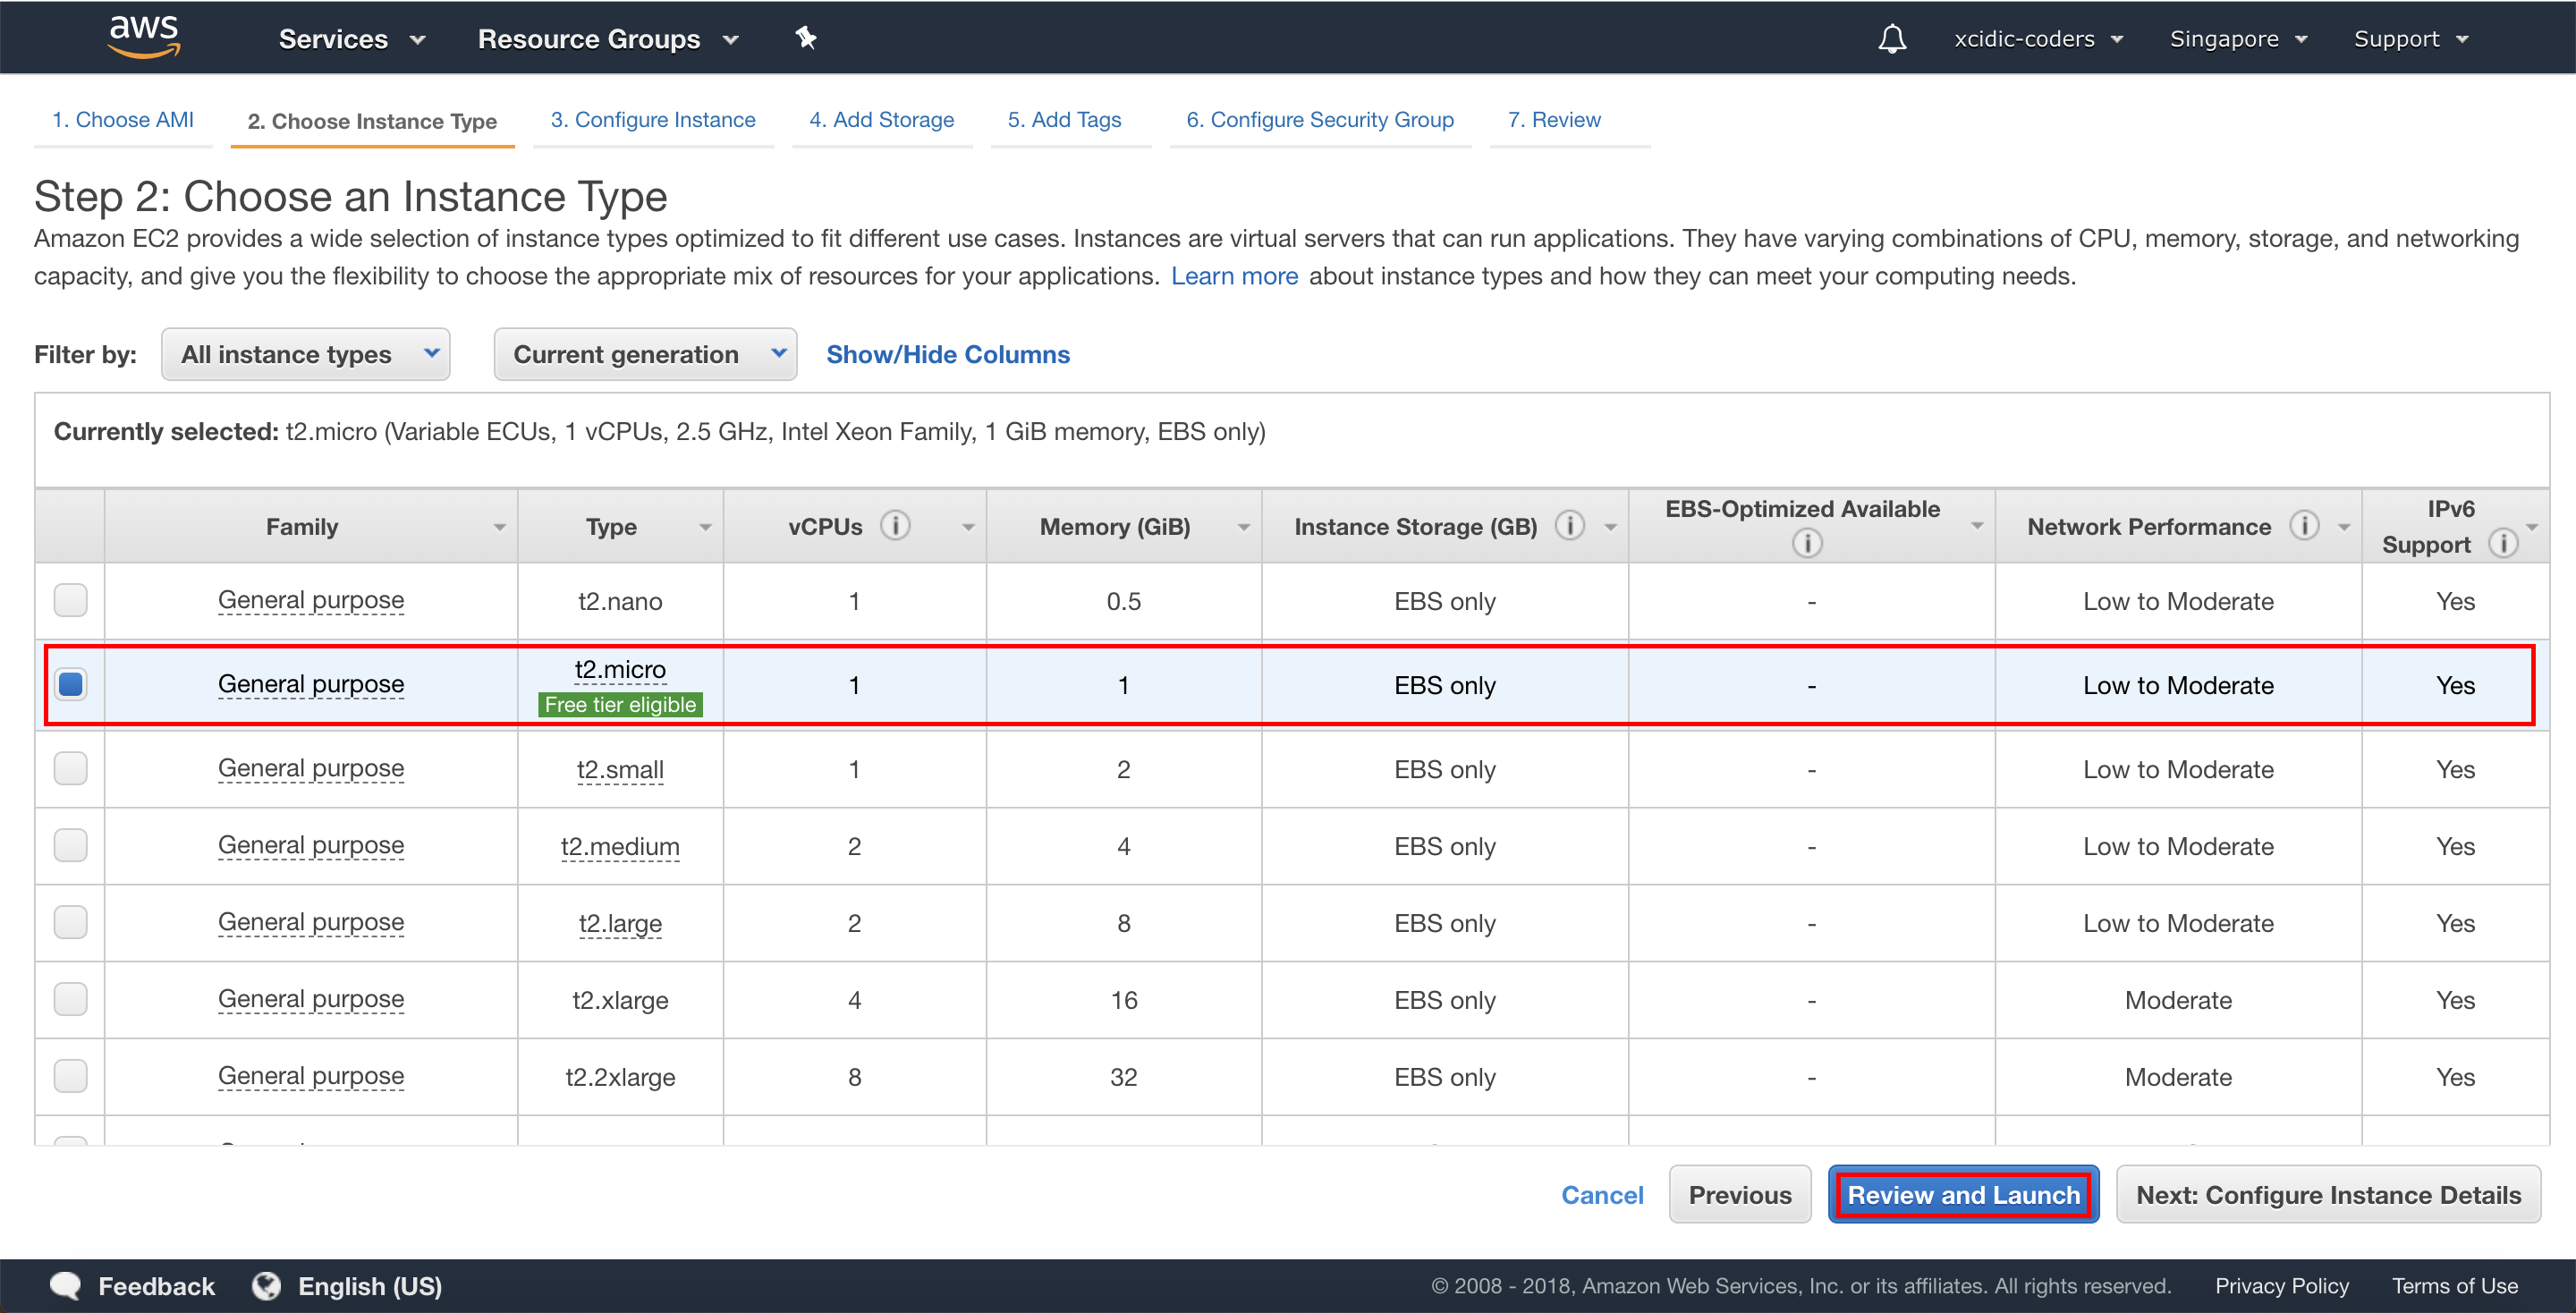
4. Choose Instance Type
Choose the Instance Type. It depends the scope of project, for default we choose “t2.micro”, then click “Next: Configure Instance Details” button.
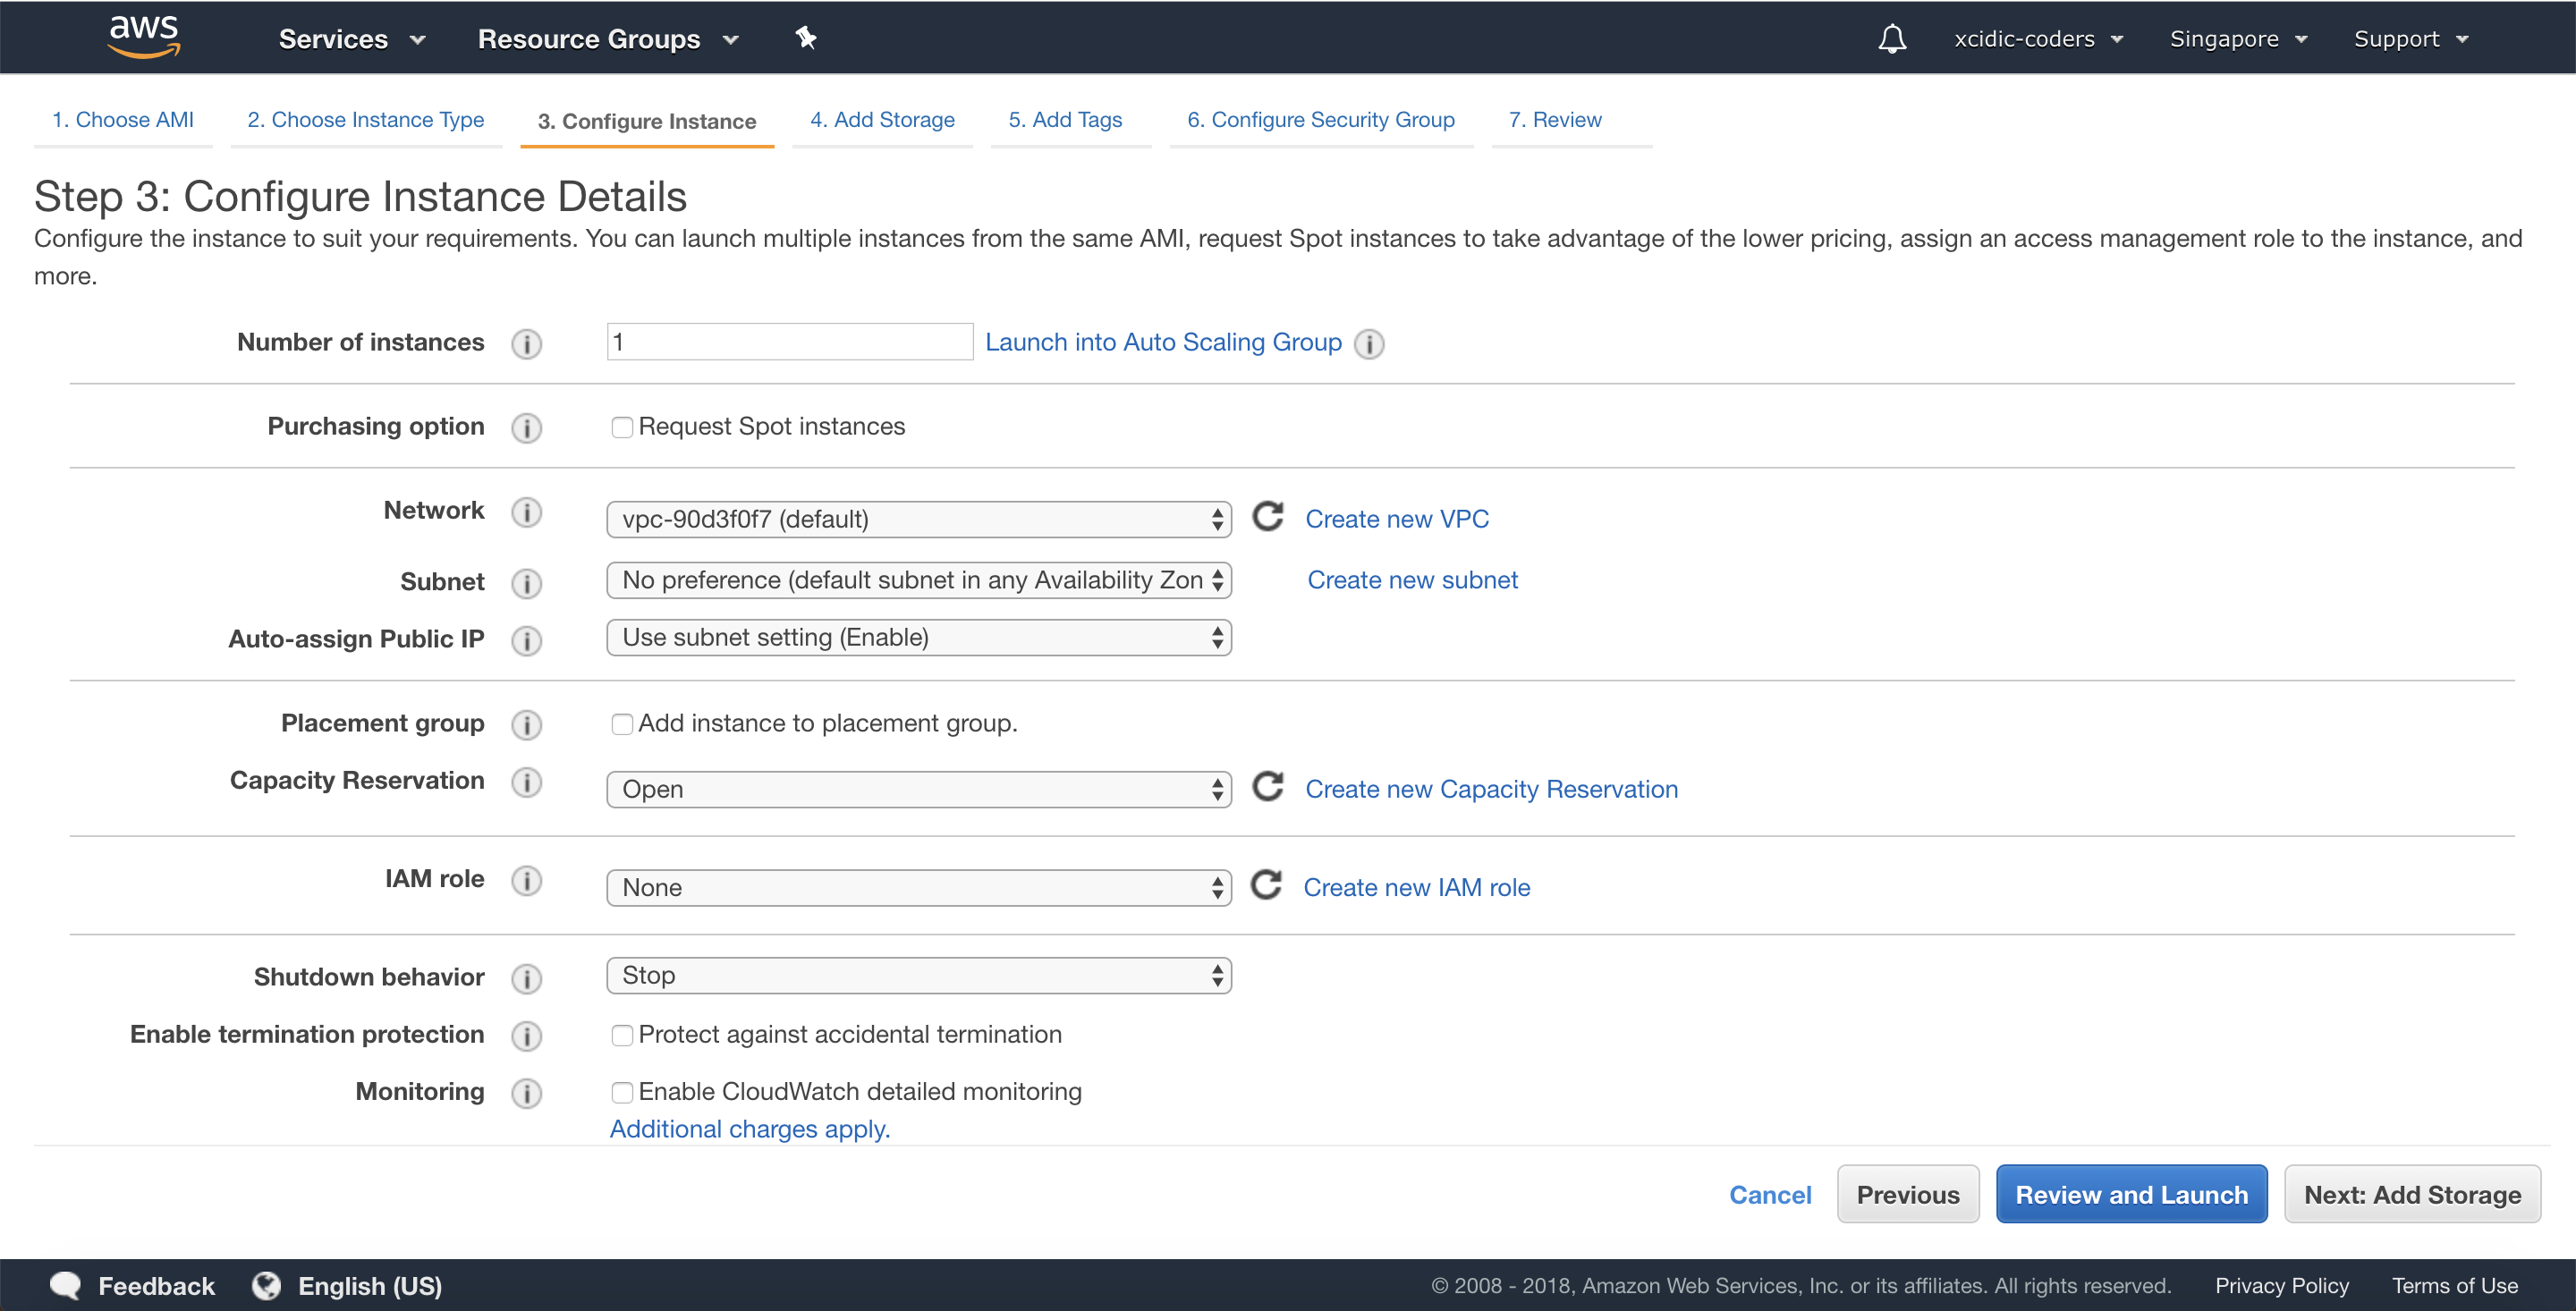
5. Configure Instance Details
For this step we use AWS default, then click “Next: Add Storage” button.
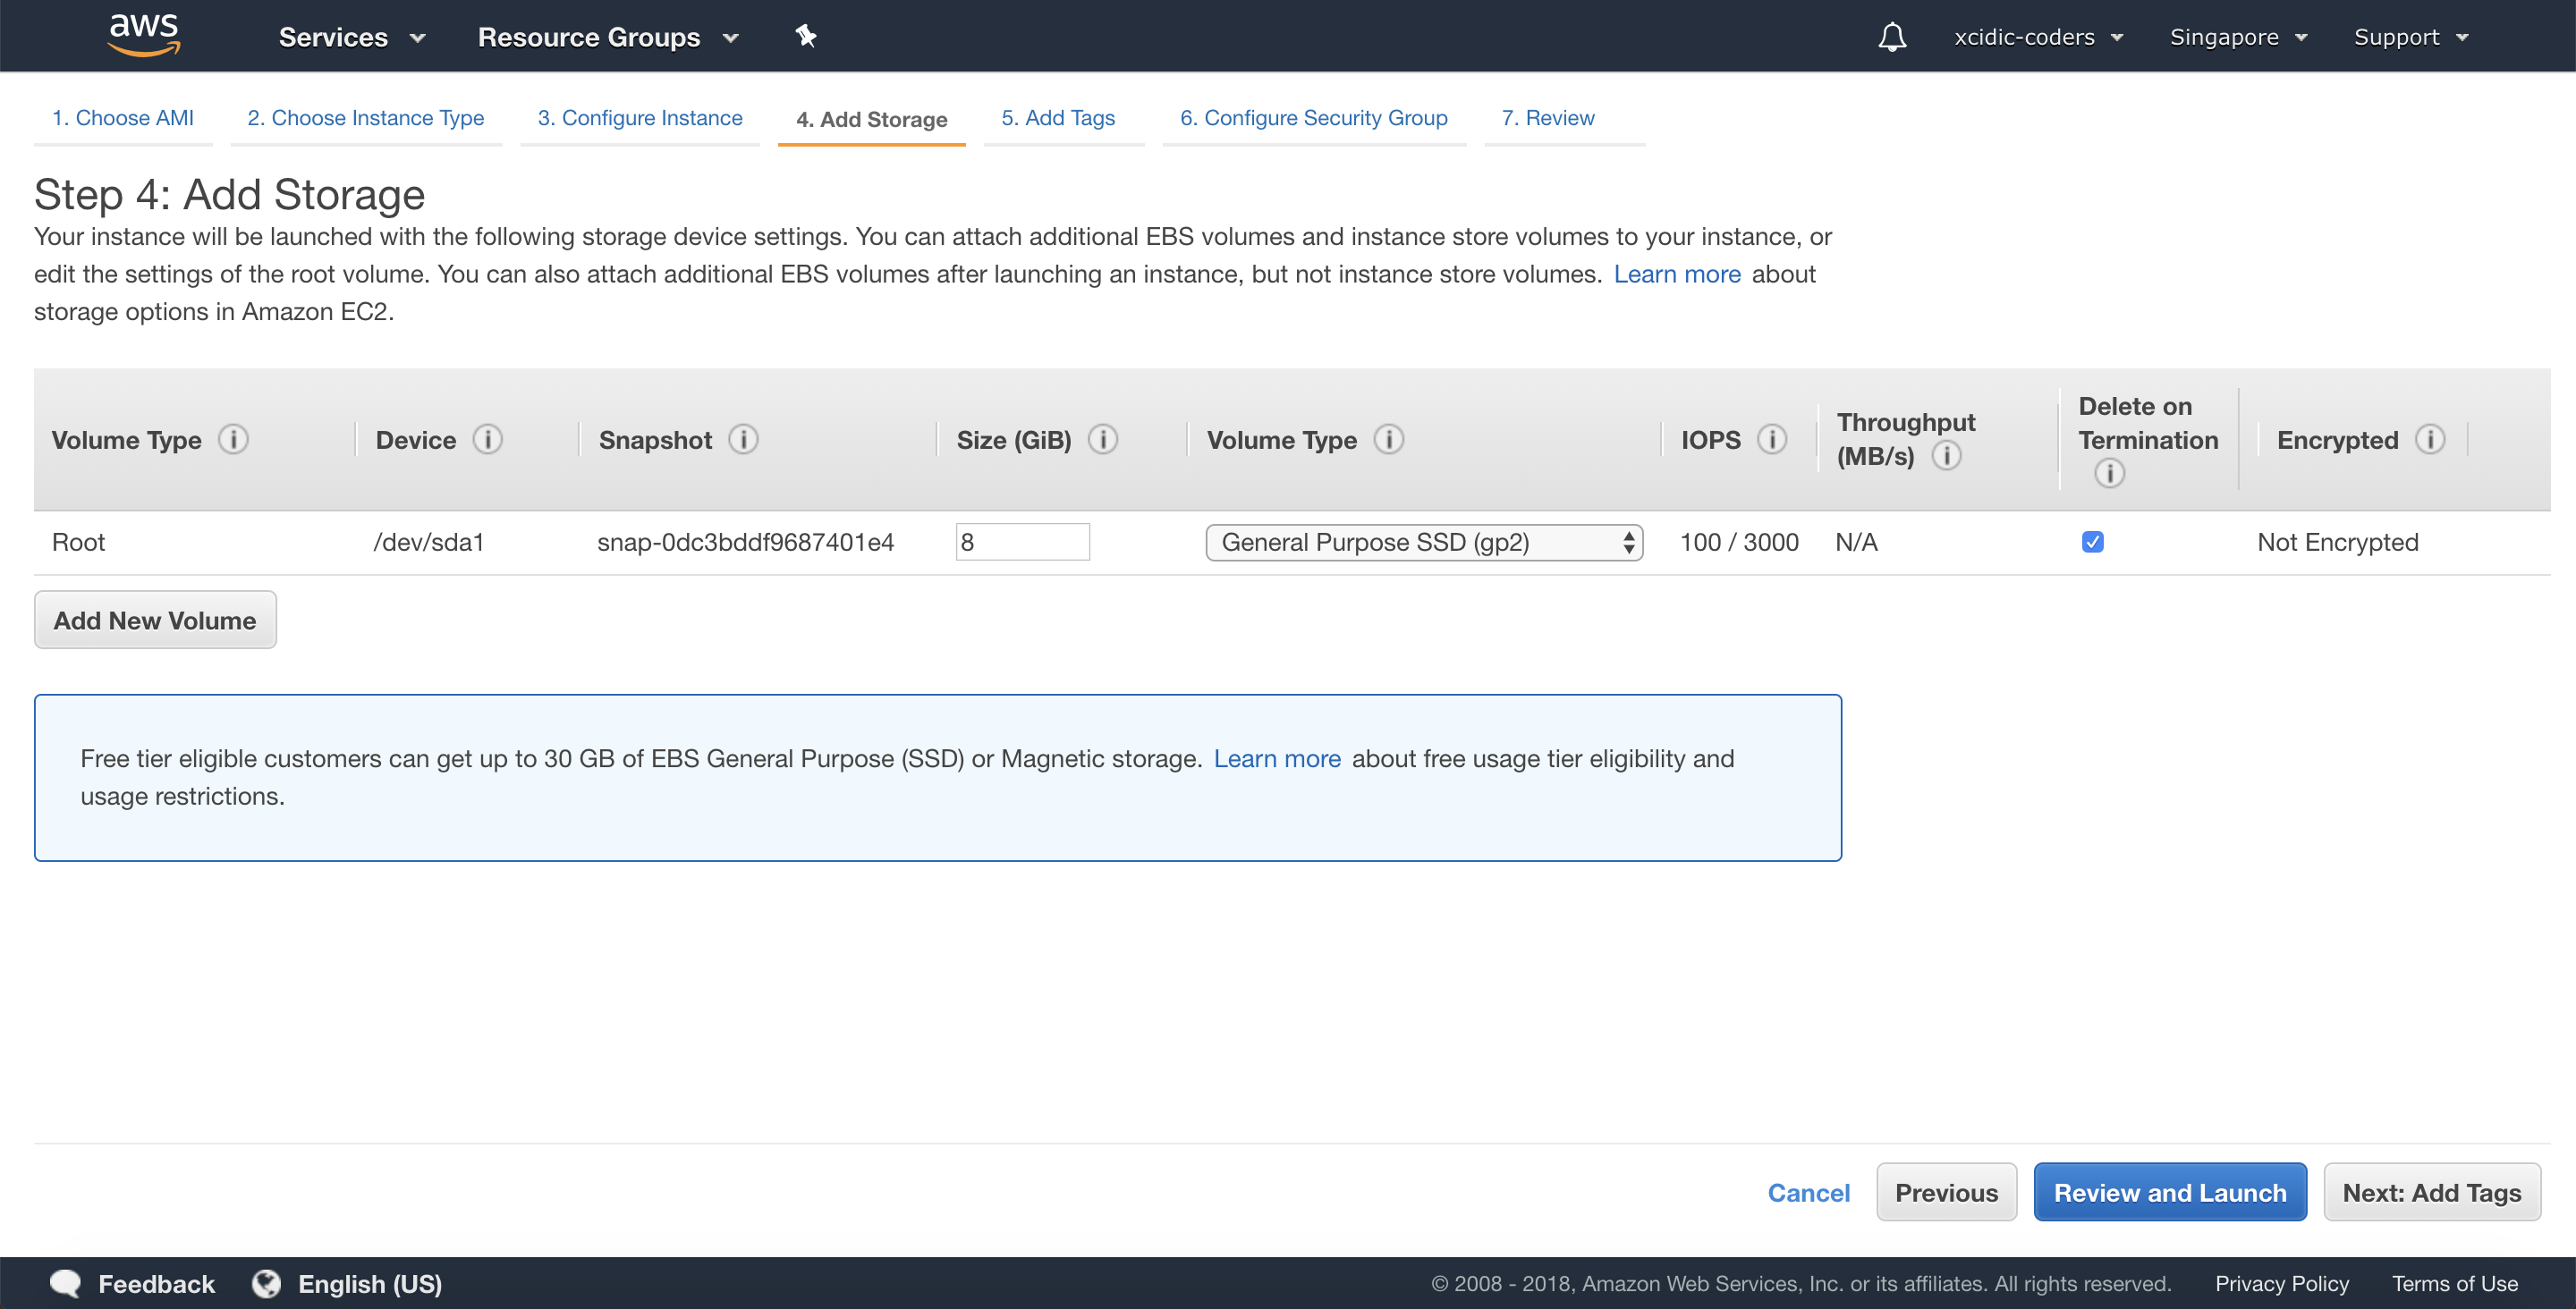
6. Add Storage
For this step we use AWS default, then click “Next: Add Tags” button.
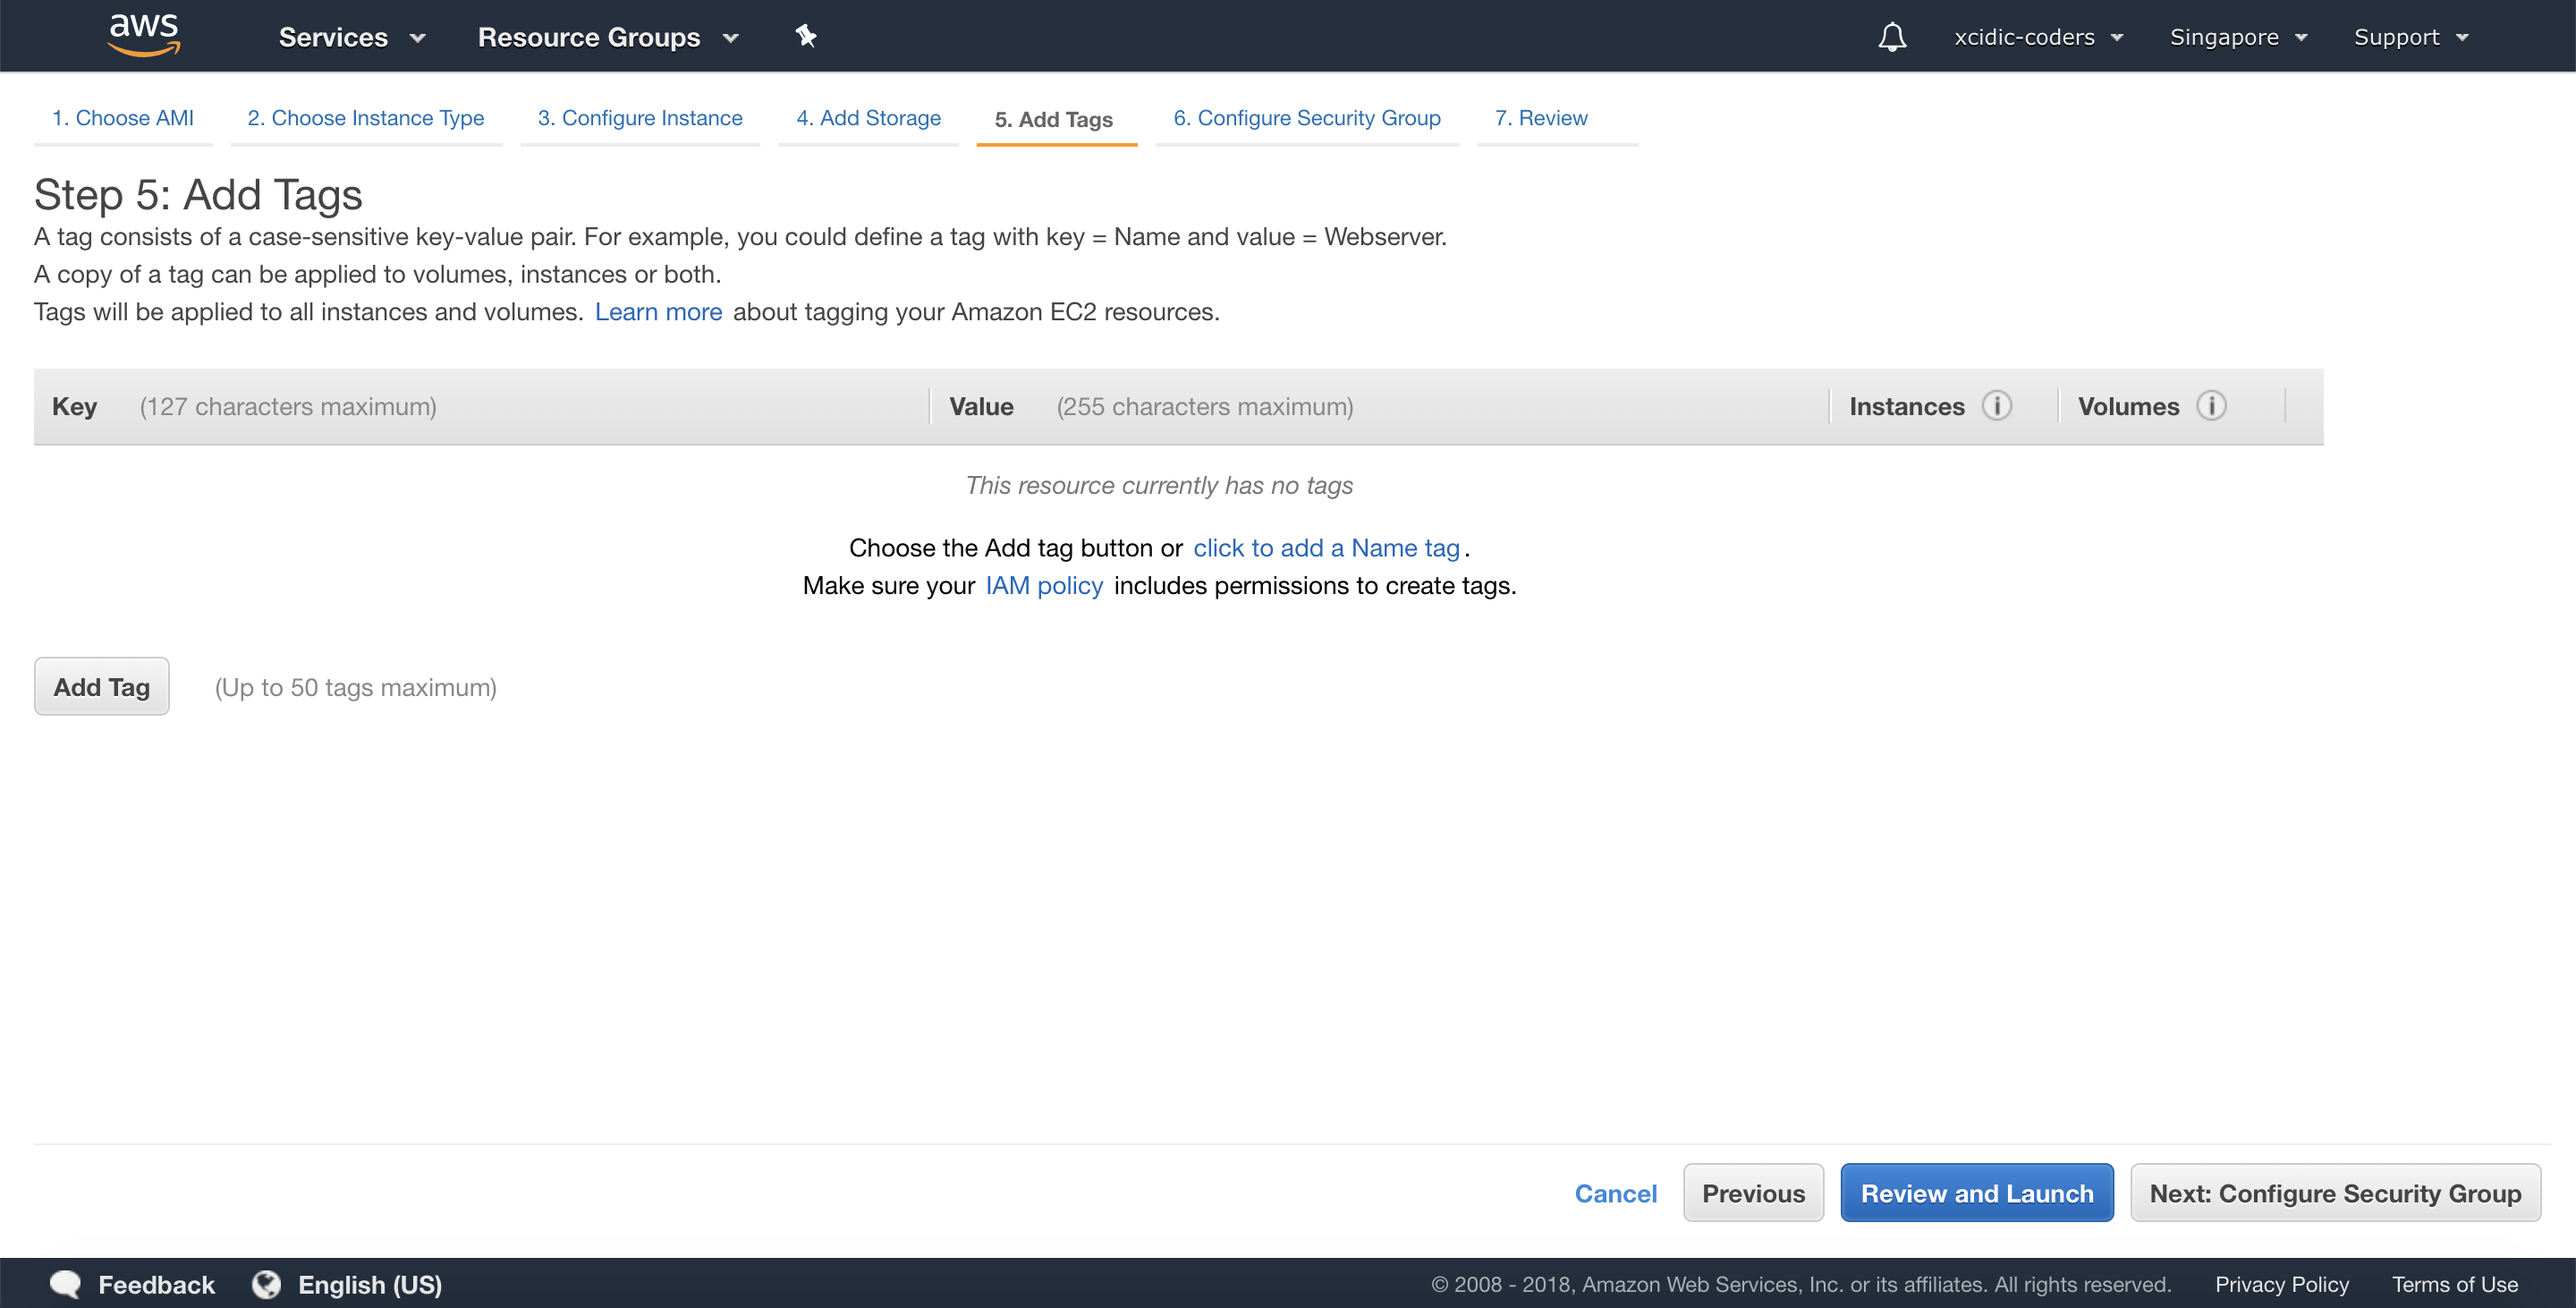
7. Add Tags
For default we don’t add tags, then click “Next: Configure Security Group” button.
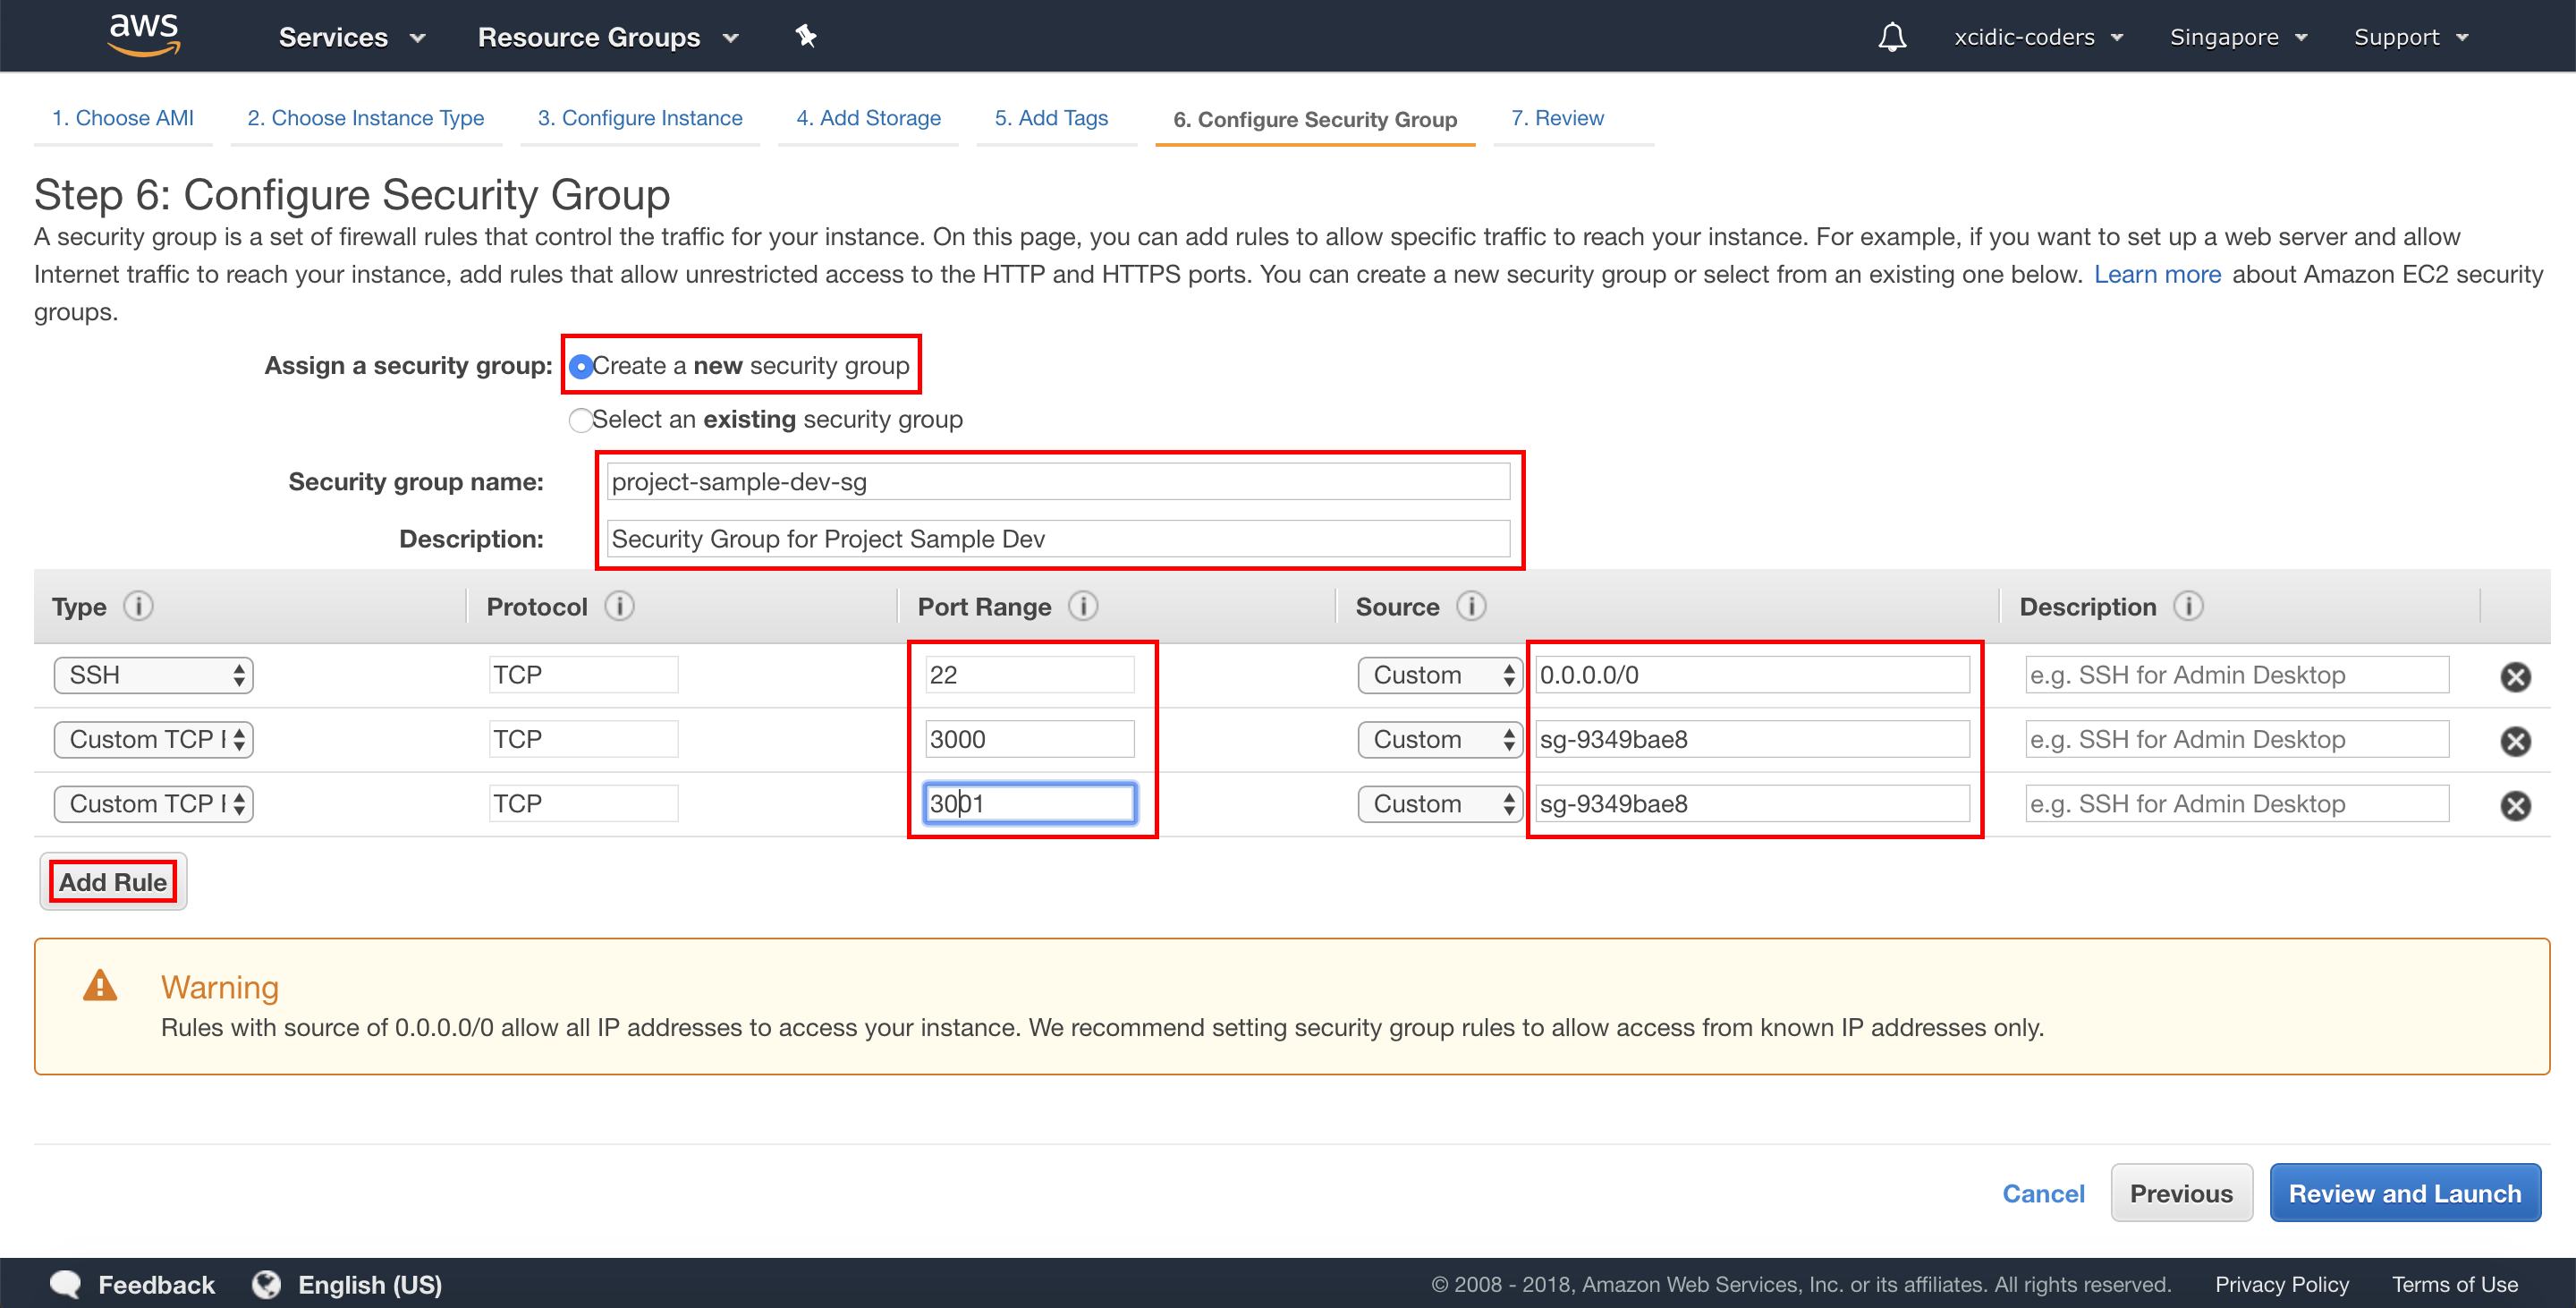
8. Configure Security Group
We create a new security group, the name depends the project name. If the project name is “Project WW Staging”, so the security group name is “project-ww-staging-sg”, add “sg” after project name.
Next, “Add Rule” to add the all ports that we use. On “Source” input, we choose Load Balancer Security Group. If finish, then click “Review and Launch” button.
*p.s: If we haven’t created Load Balancer Security Group yet, please click this link.
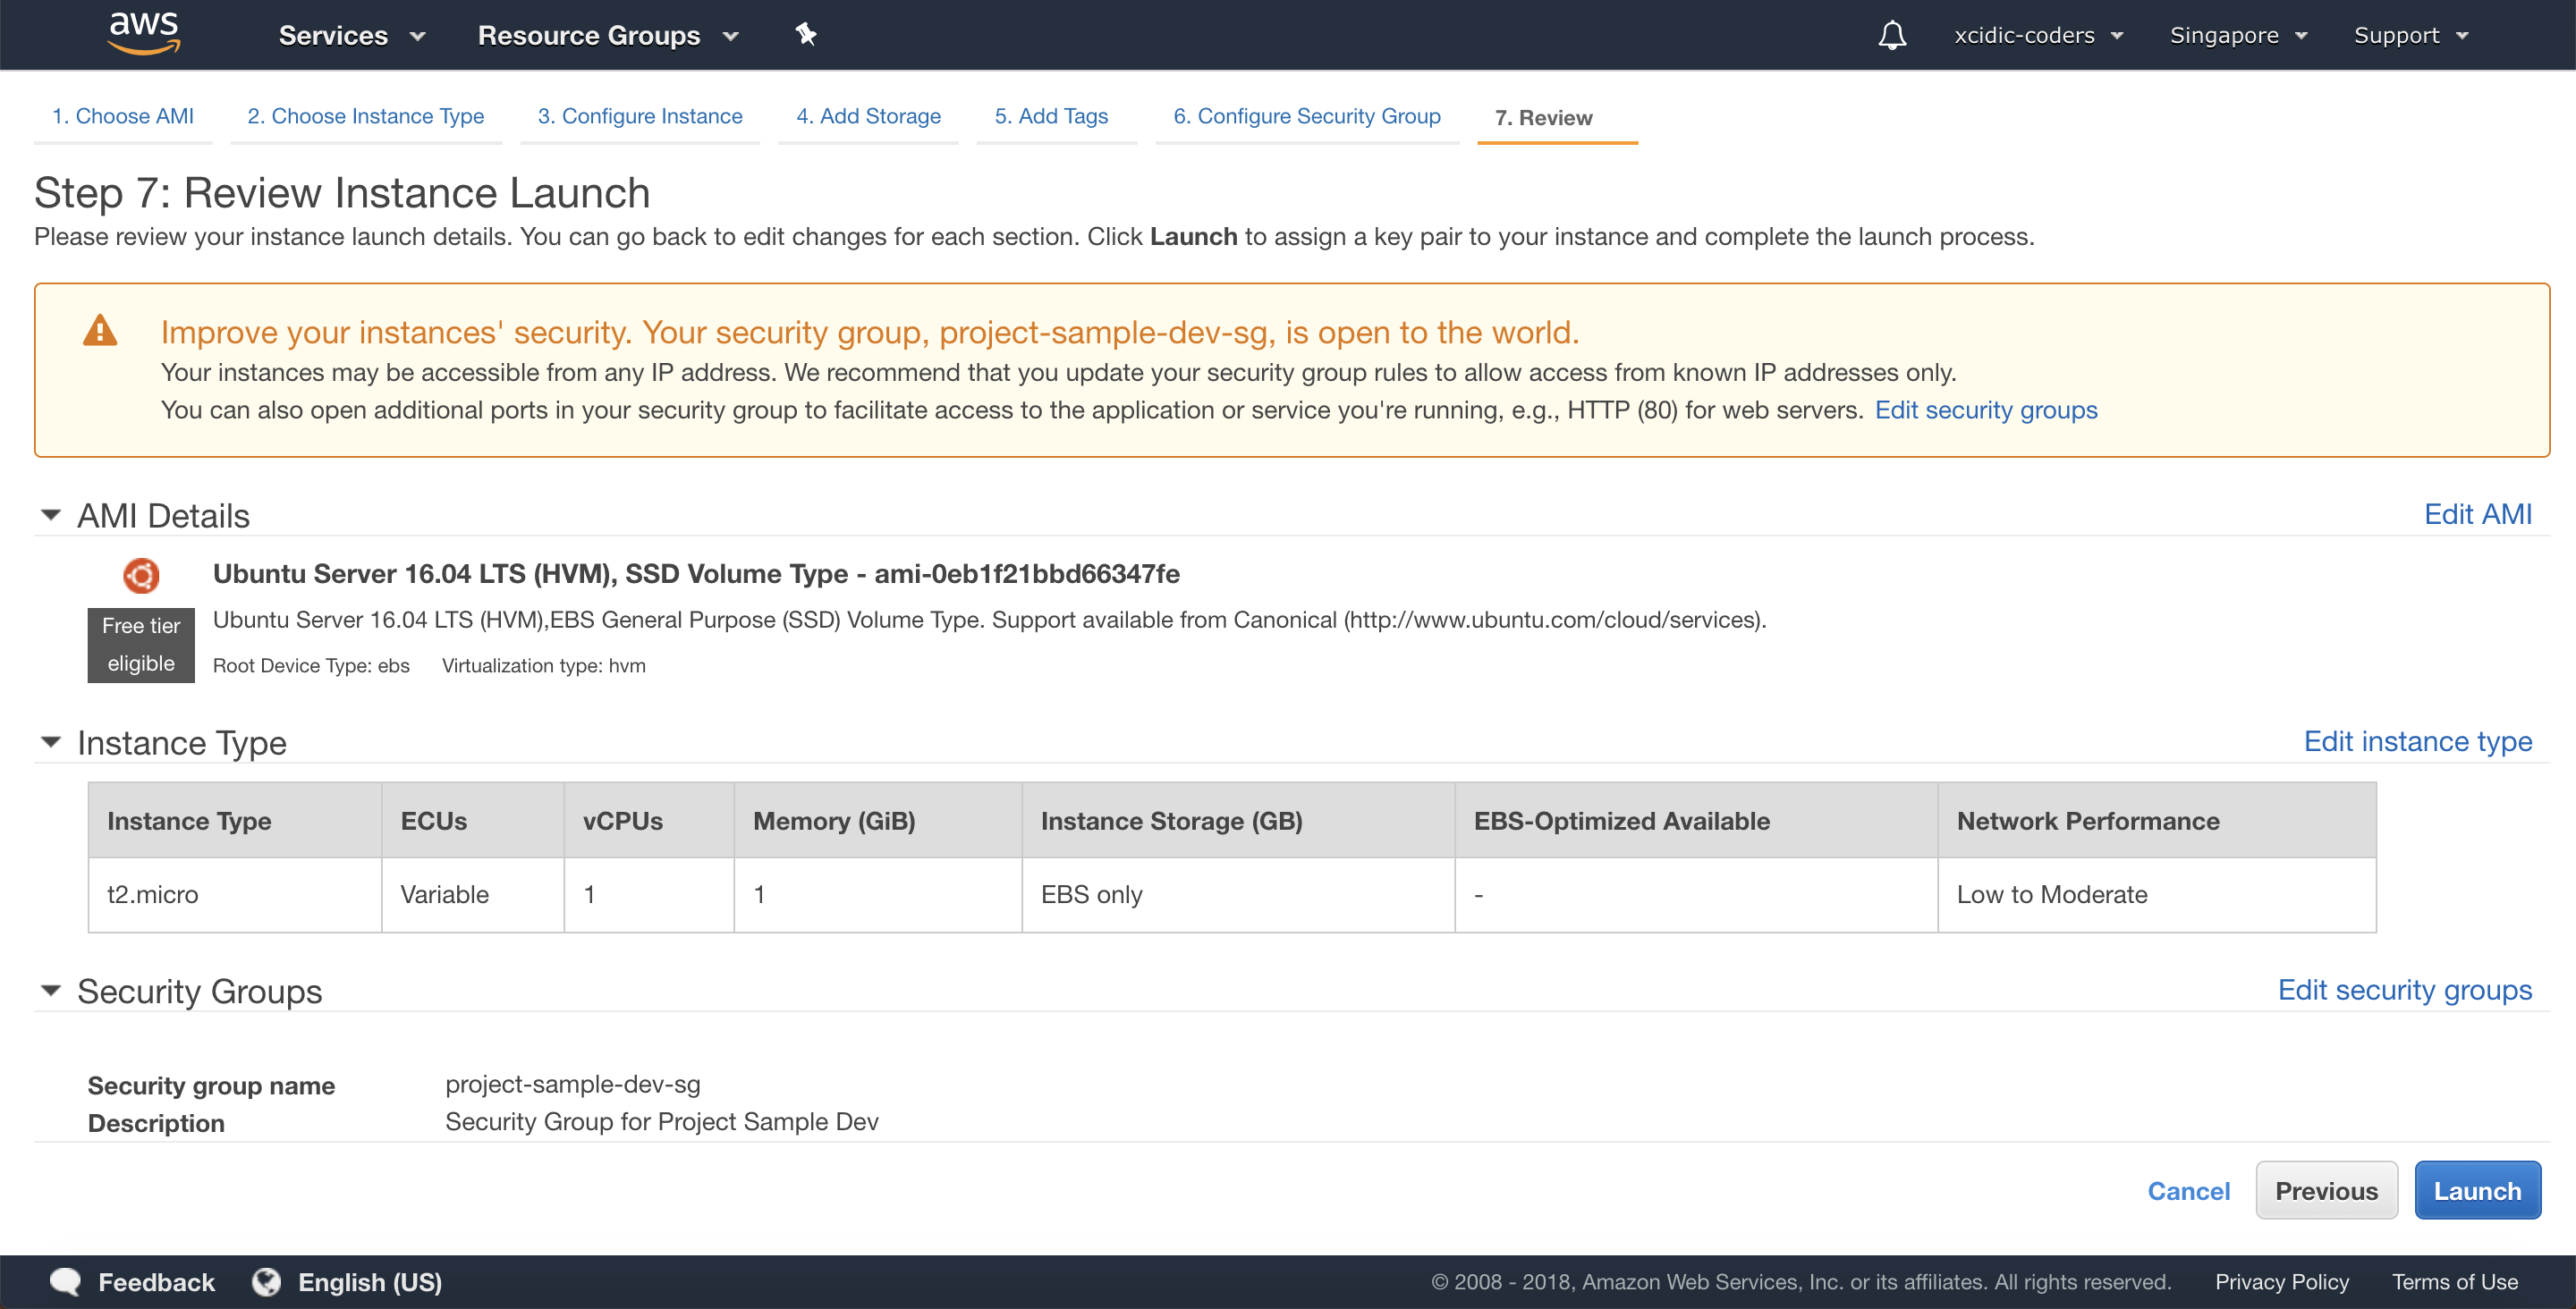
9. Review the Instance
Review an instance detail. If we are sure to create this instance, just click “Launch” button. Finish. 😊