Create Load Balancer
1. Choose EC2
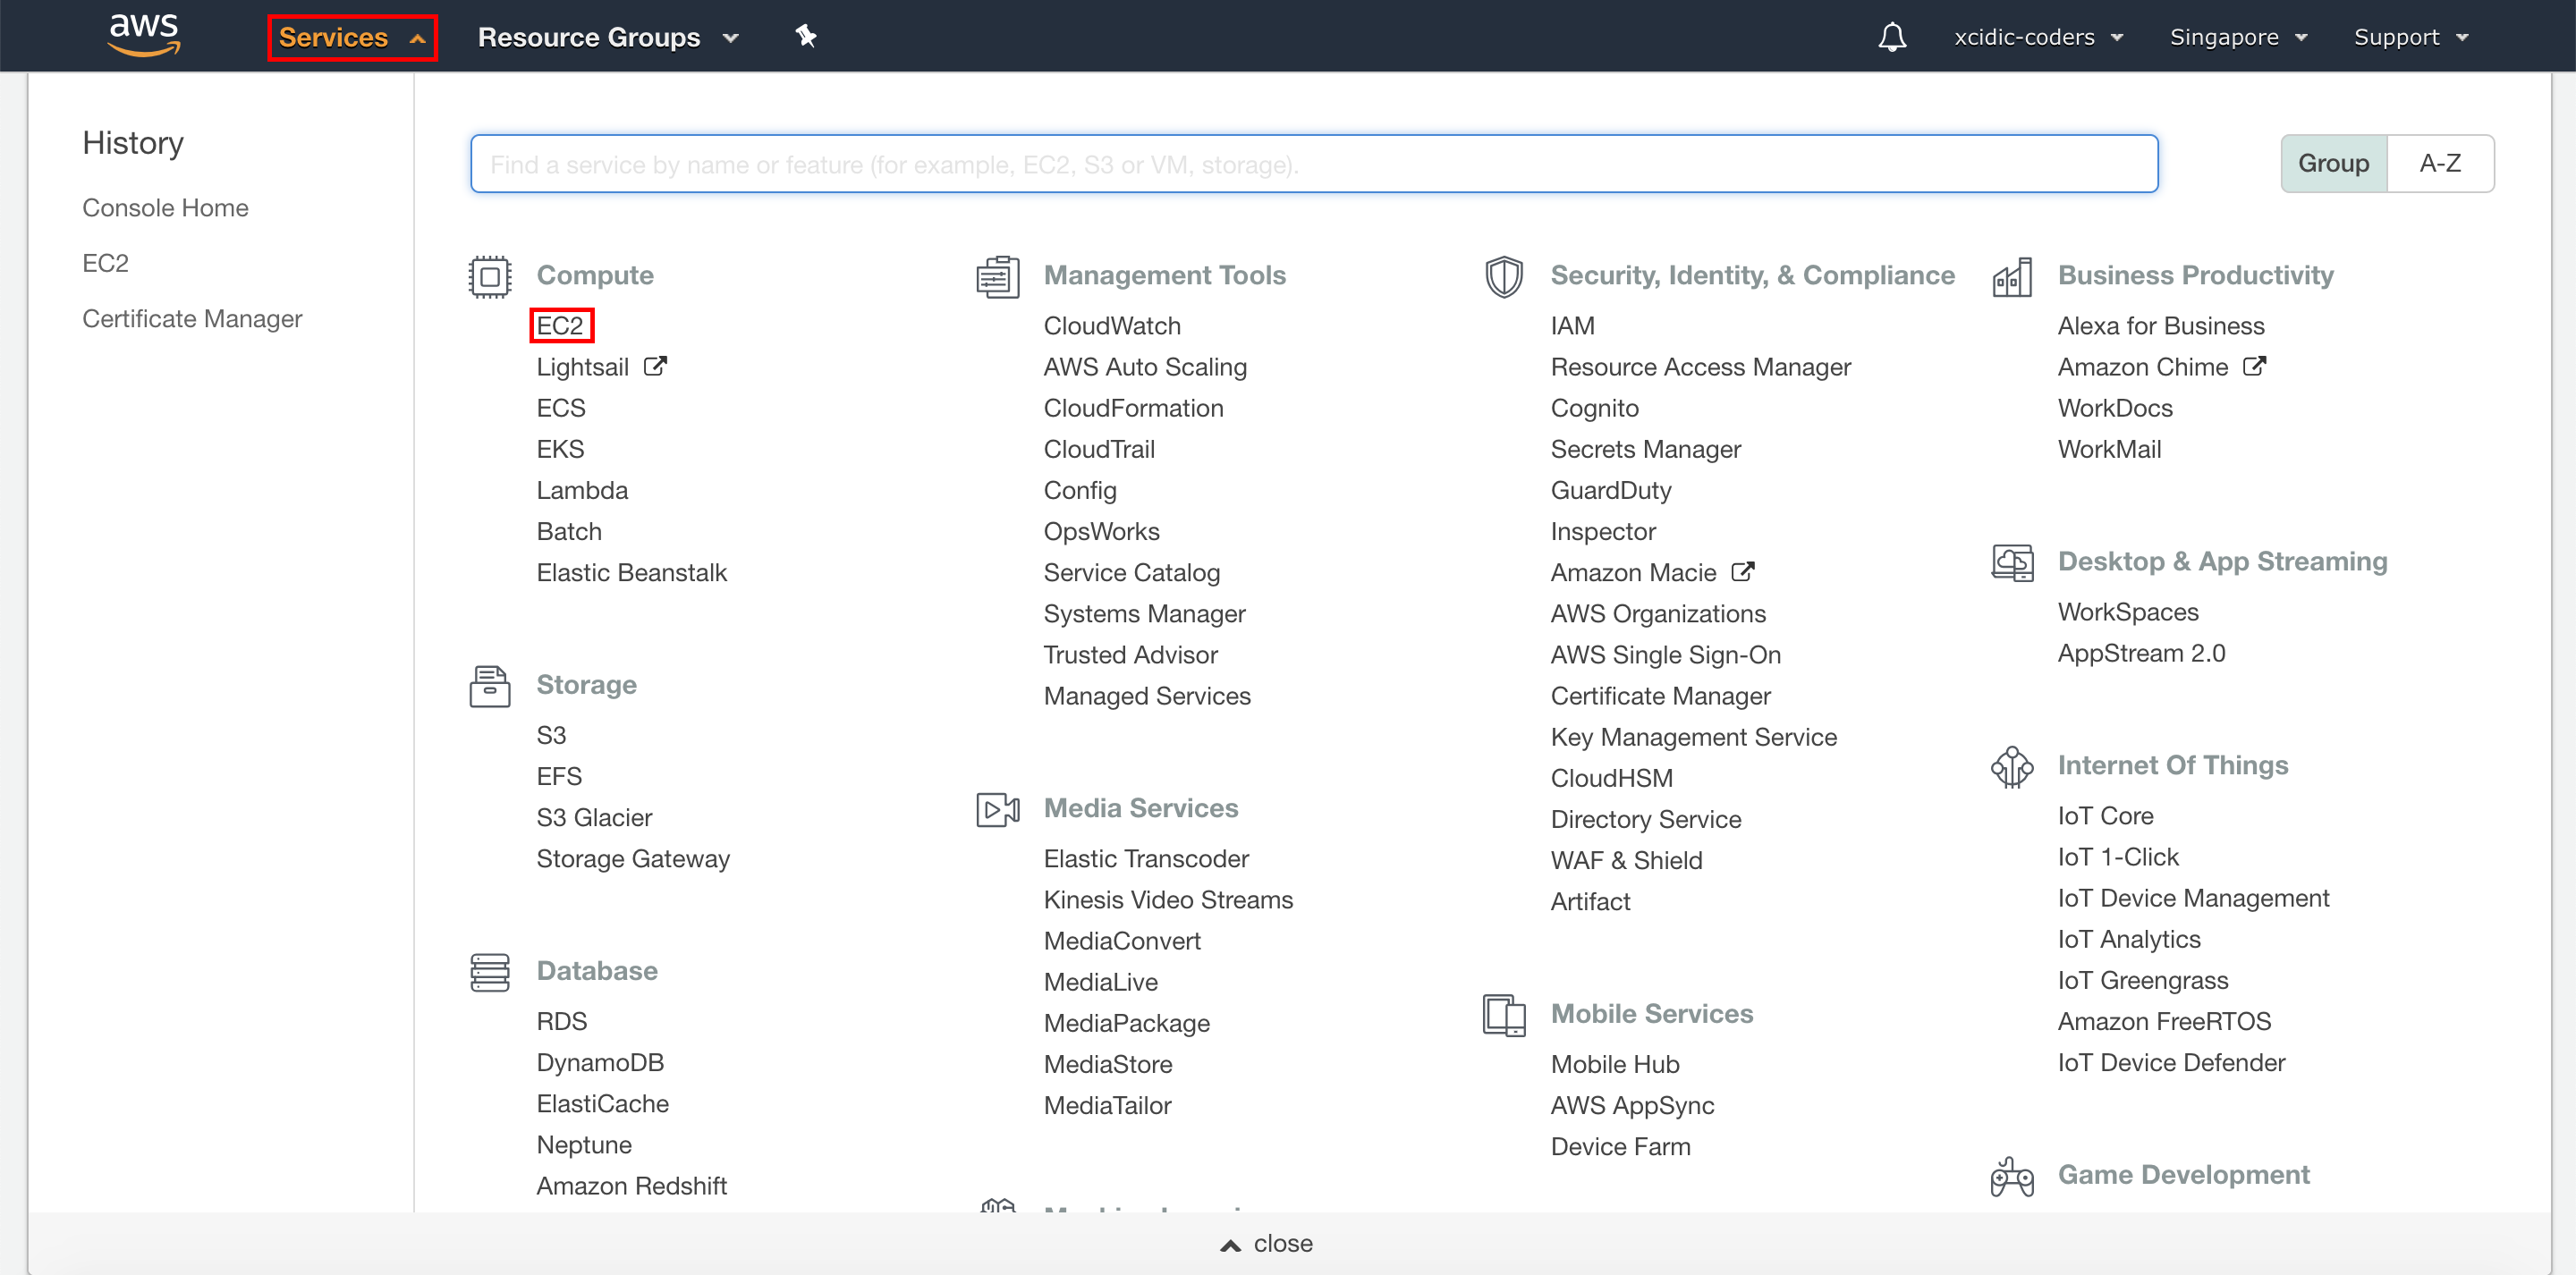
After Sign In success, click menu “Service” on header, then click “EC2”.
2. Create Load Balancer
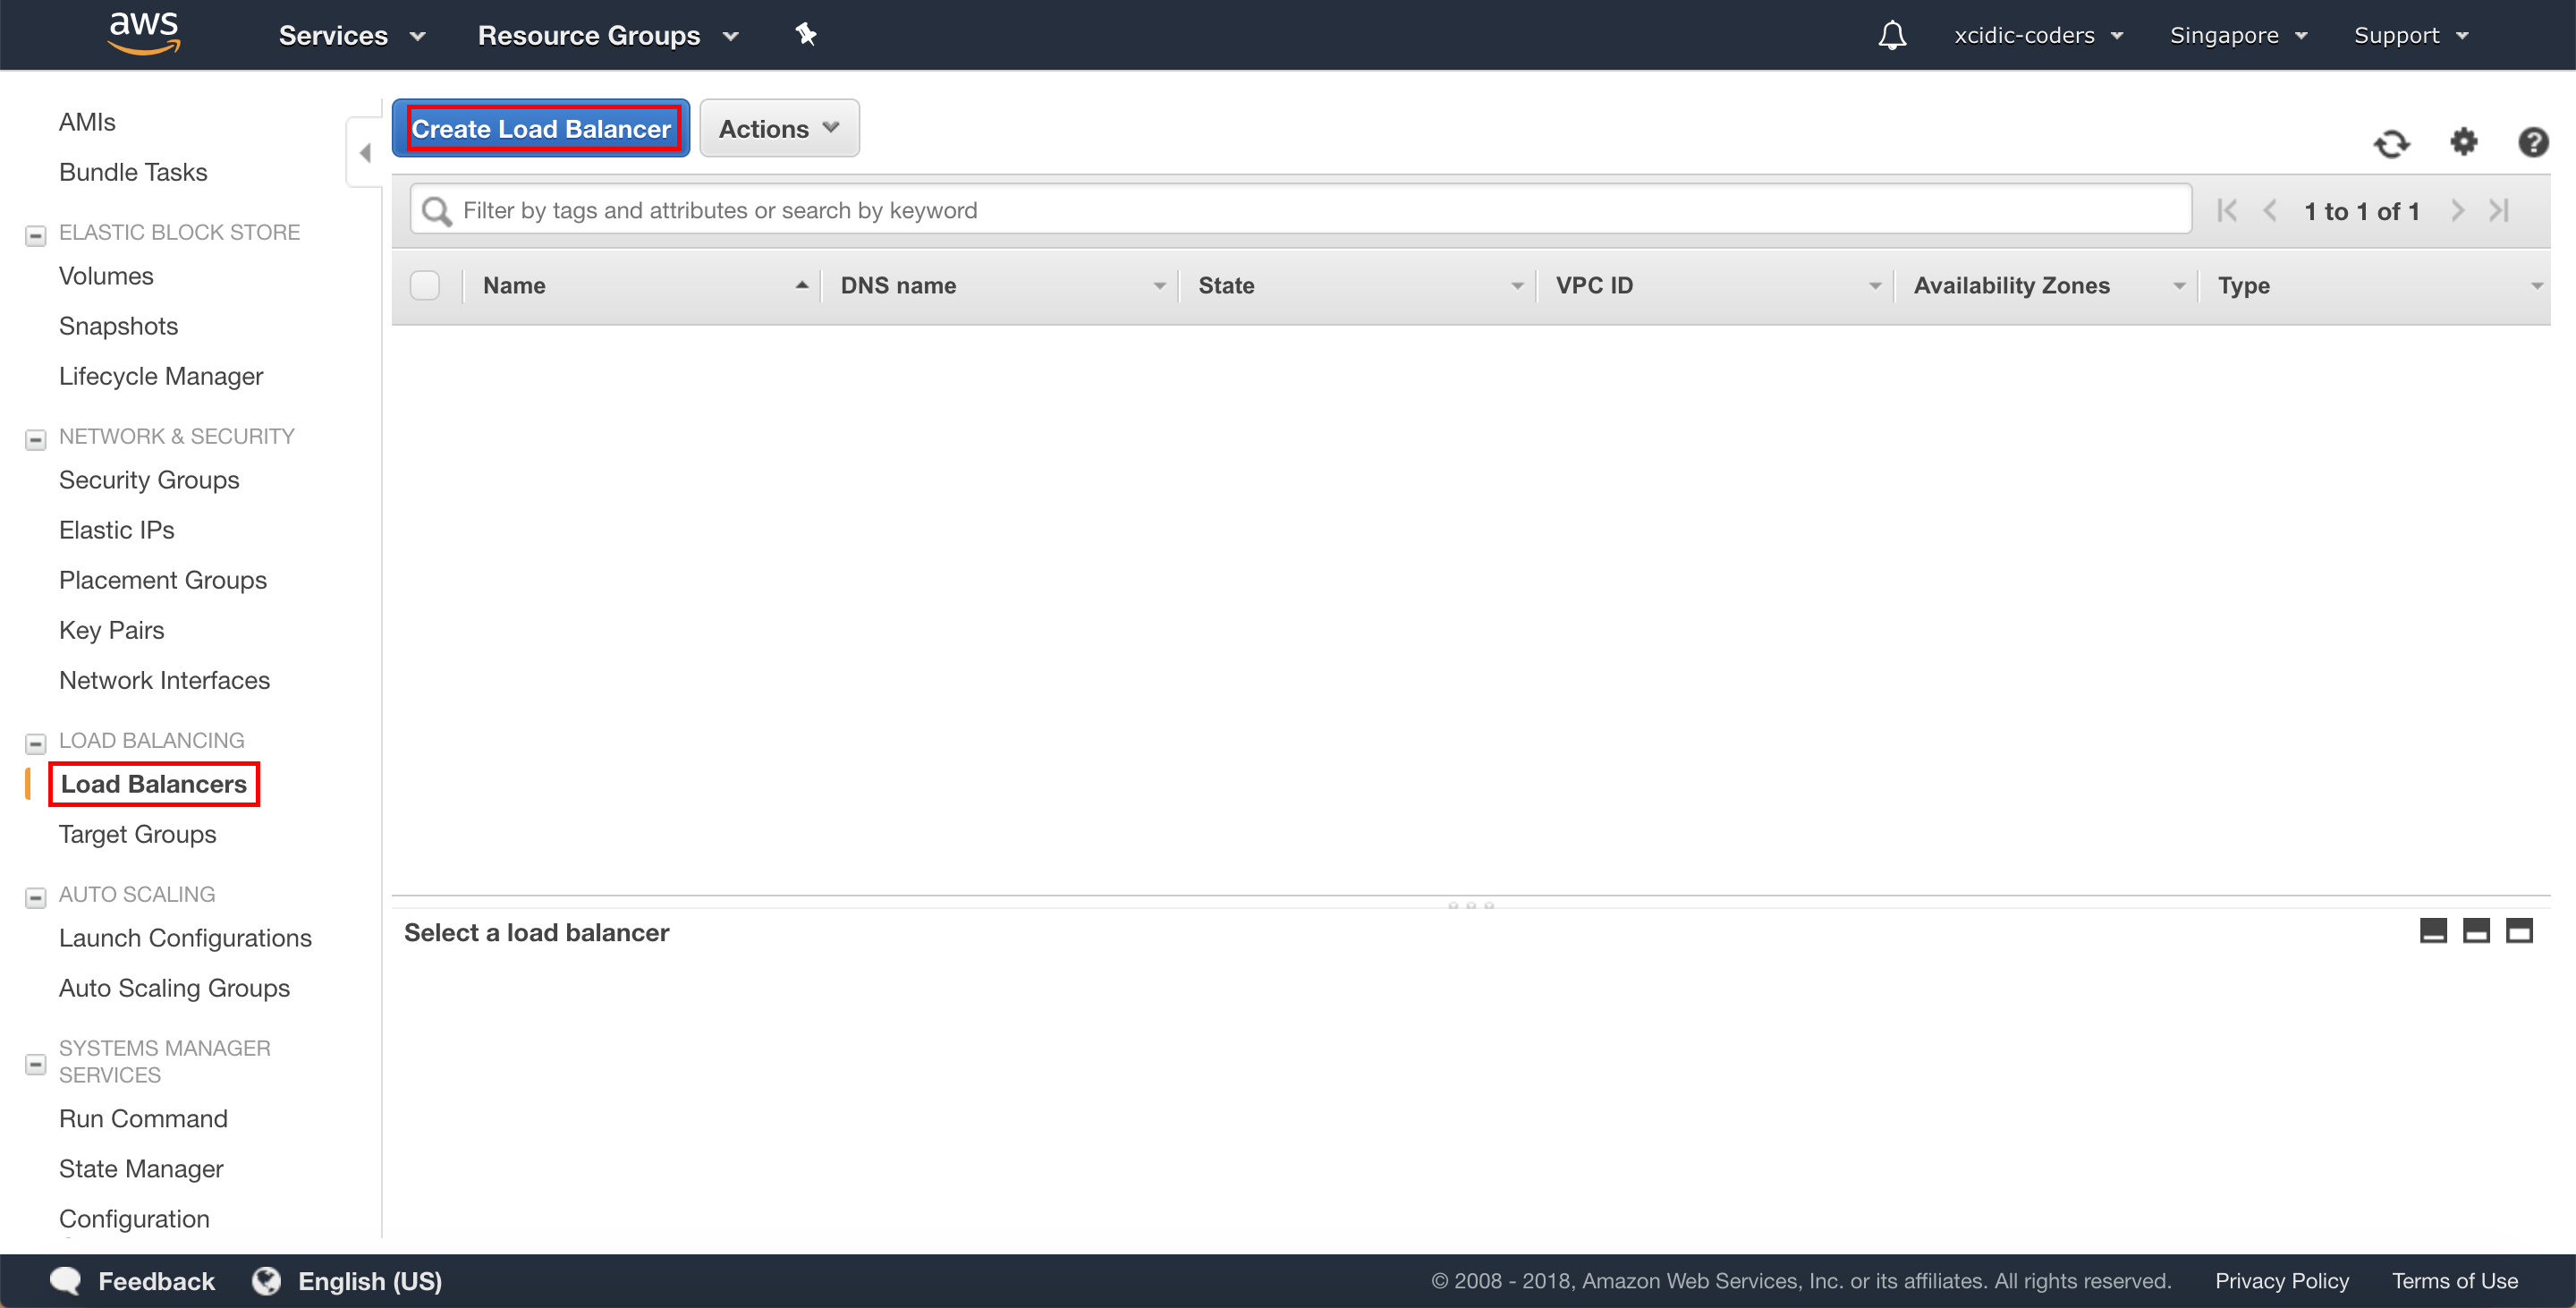
Click “Load Balancers” on left menu, then click “Create Load Balancer” button to create a new load balancer.
3. Select Load Balancer type
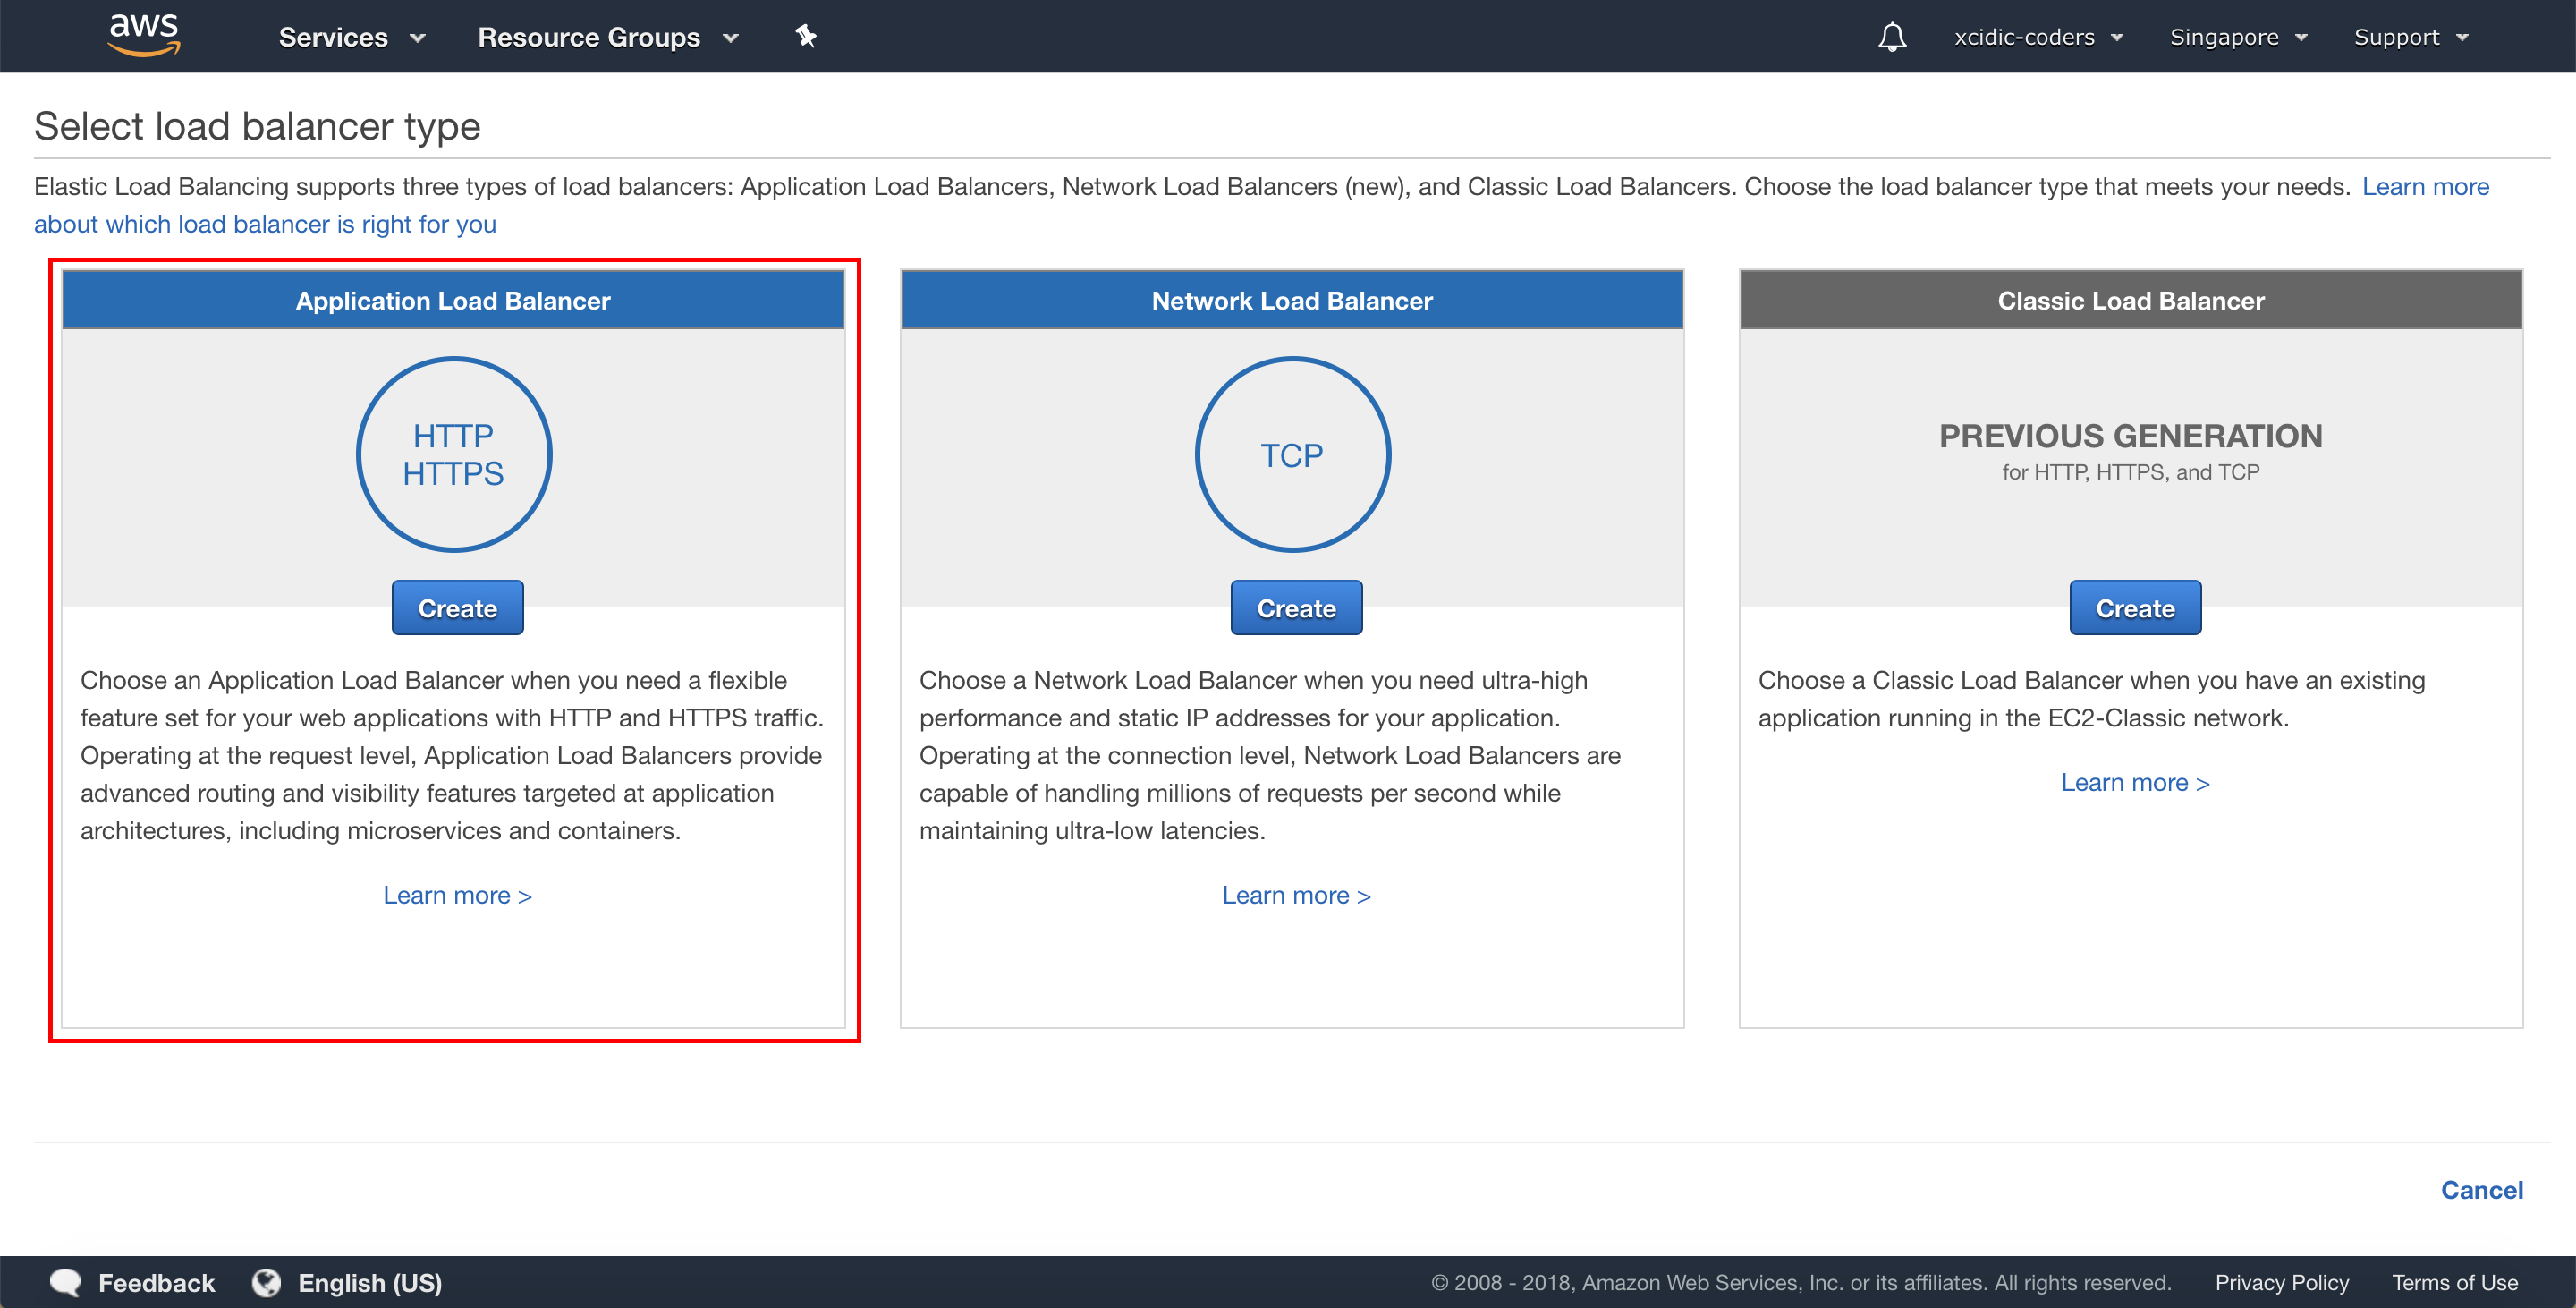
Click “Create” button on “Application Load Balancer” with HTTP/HTTPS logo.
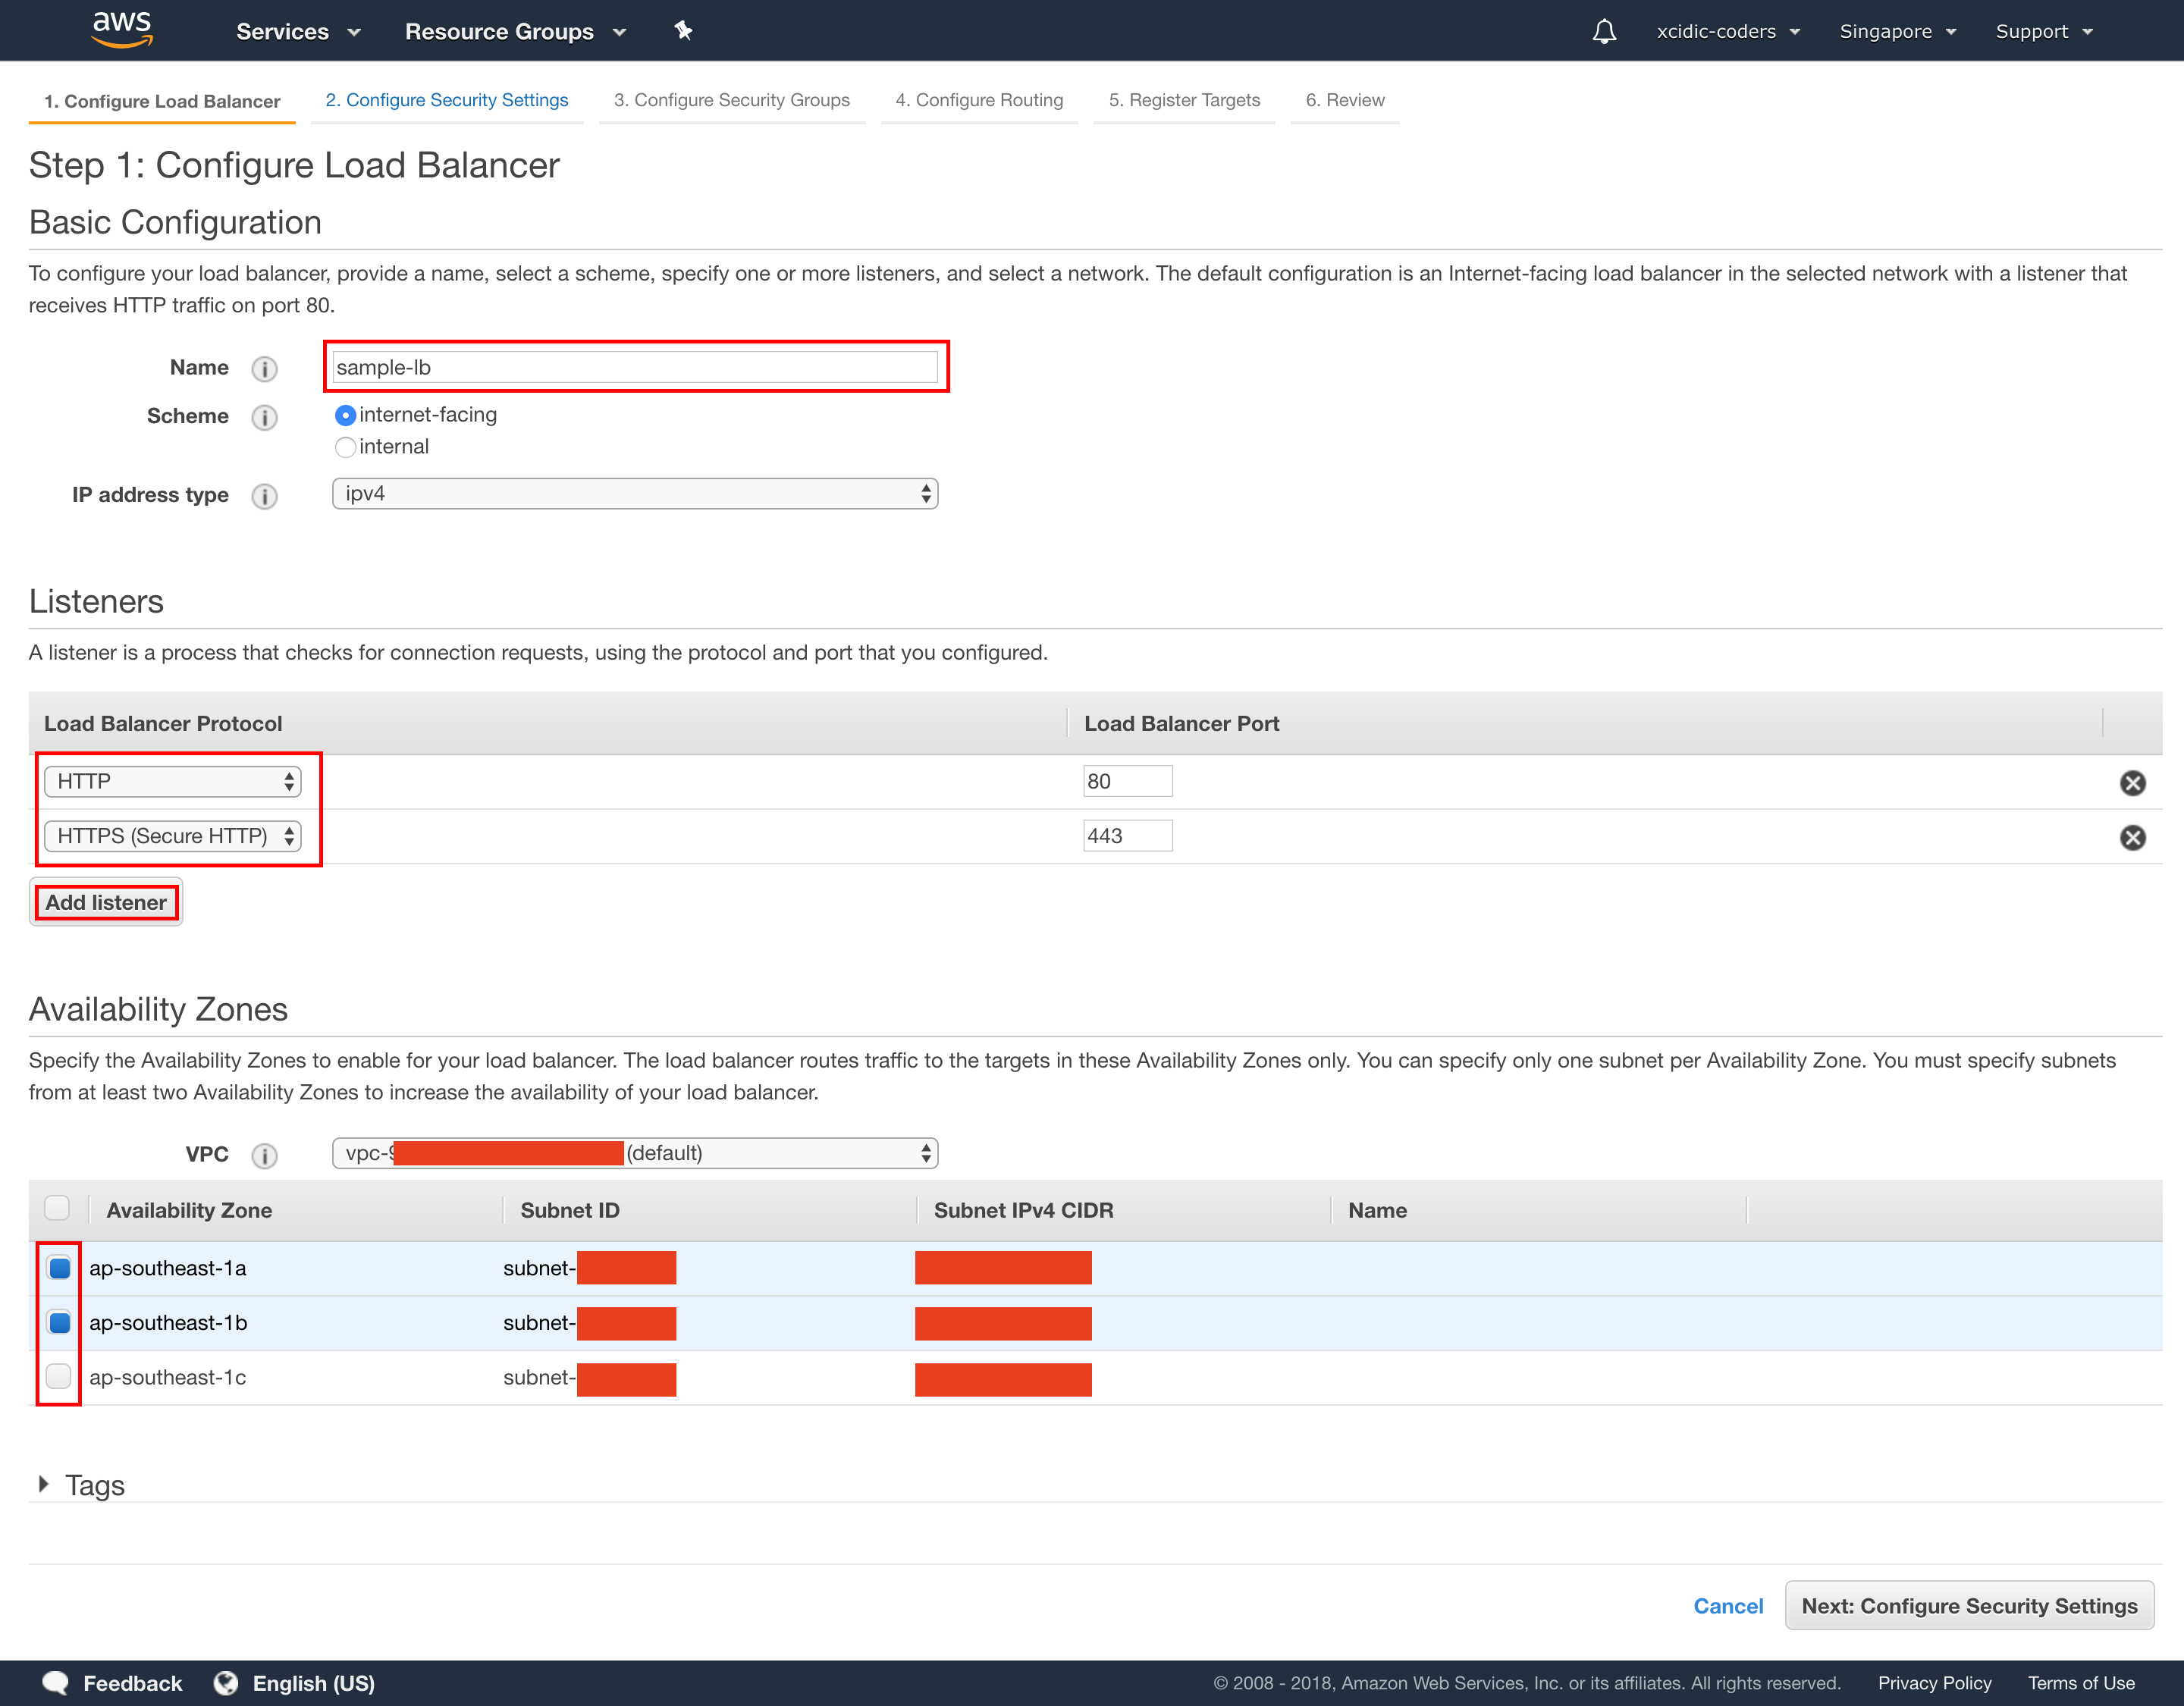
4. Configure Load Balancer
Type the Load Balancer name, then Add “HTTPS” on Listeners, then choose 2 Availability Zones, then click “Next: Configure Security Settings”.
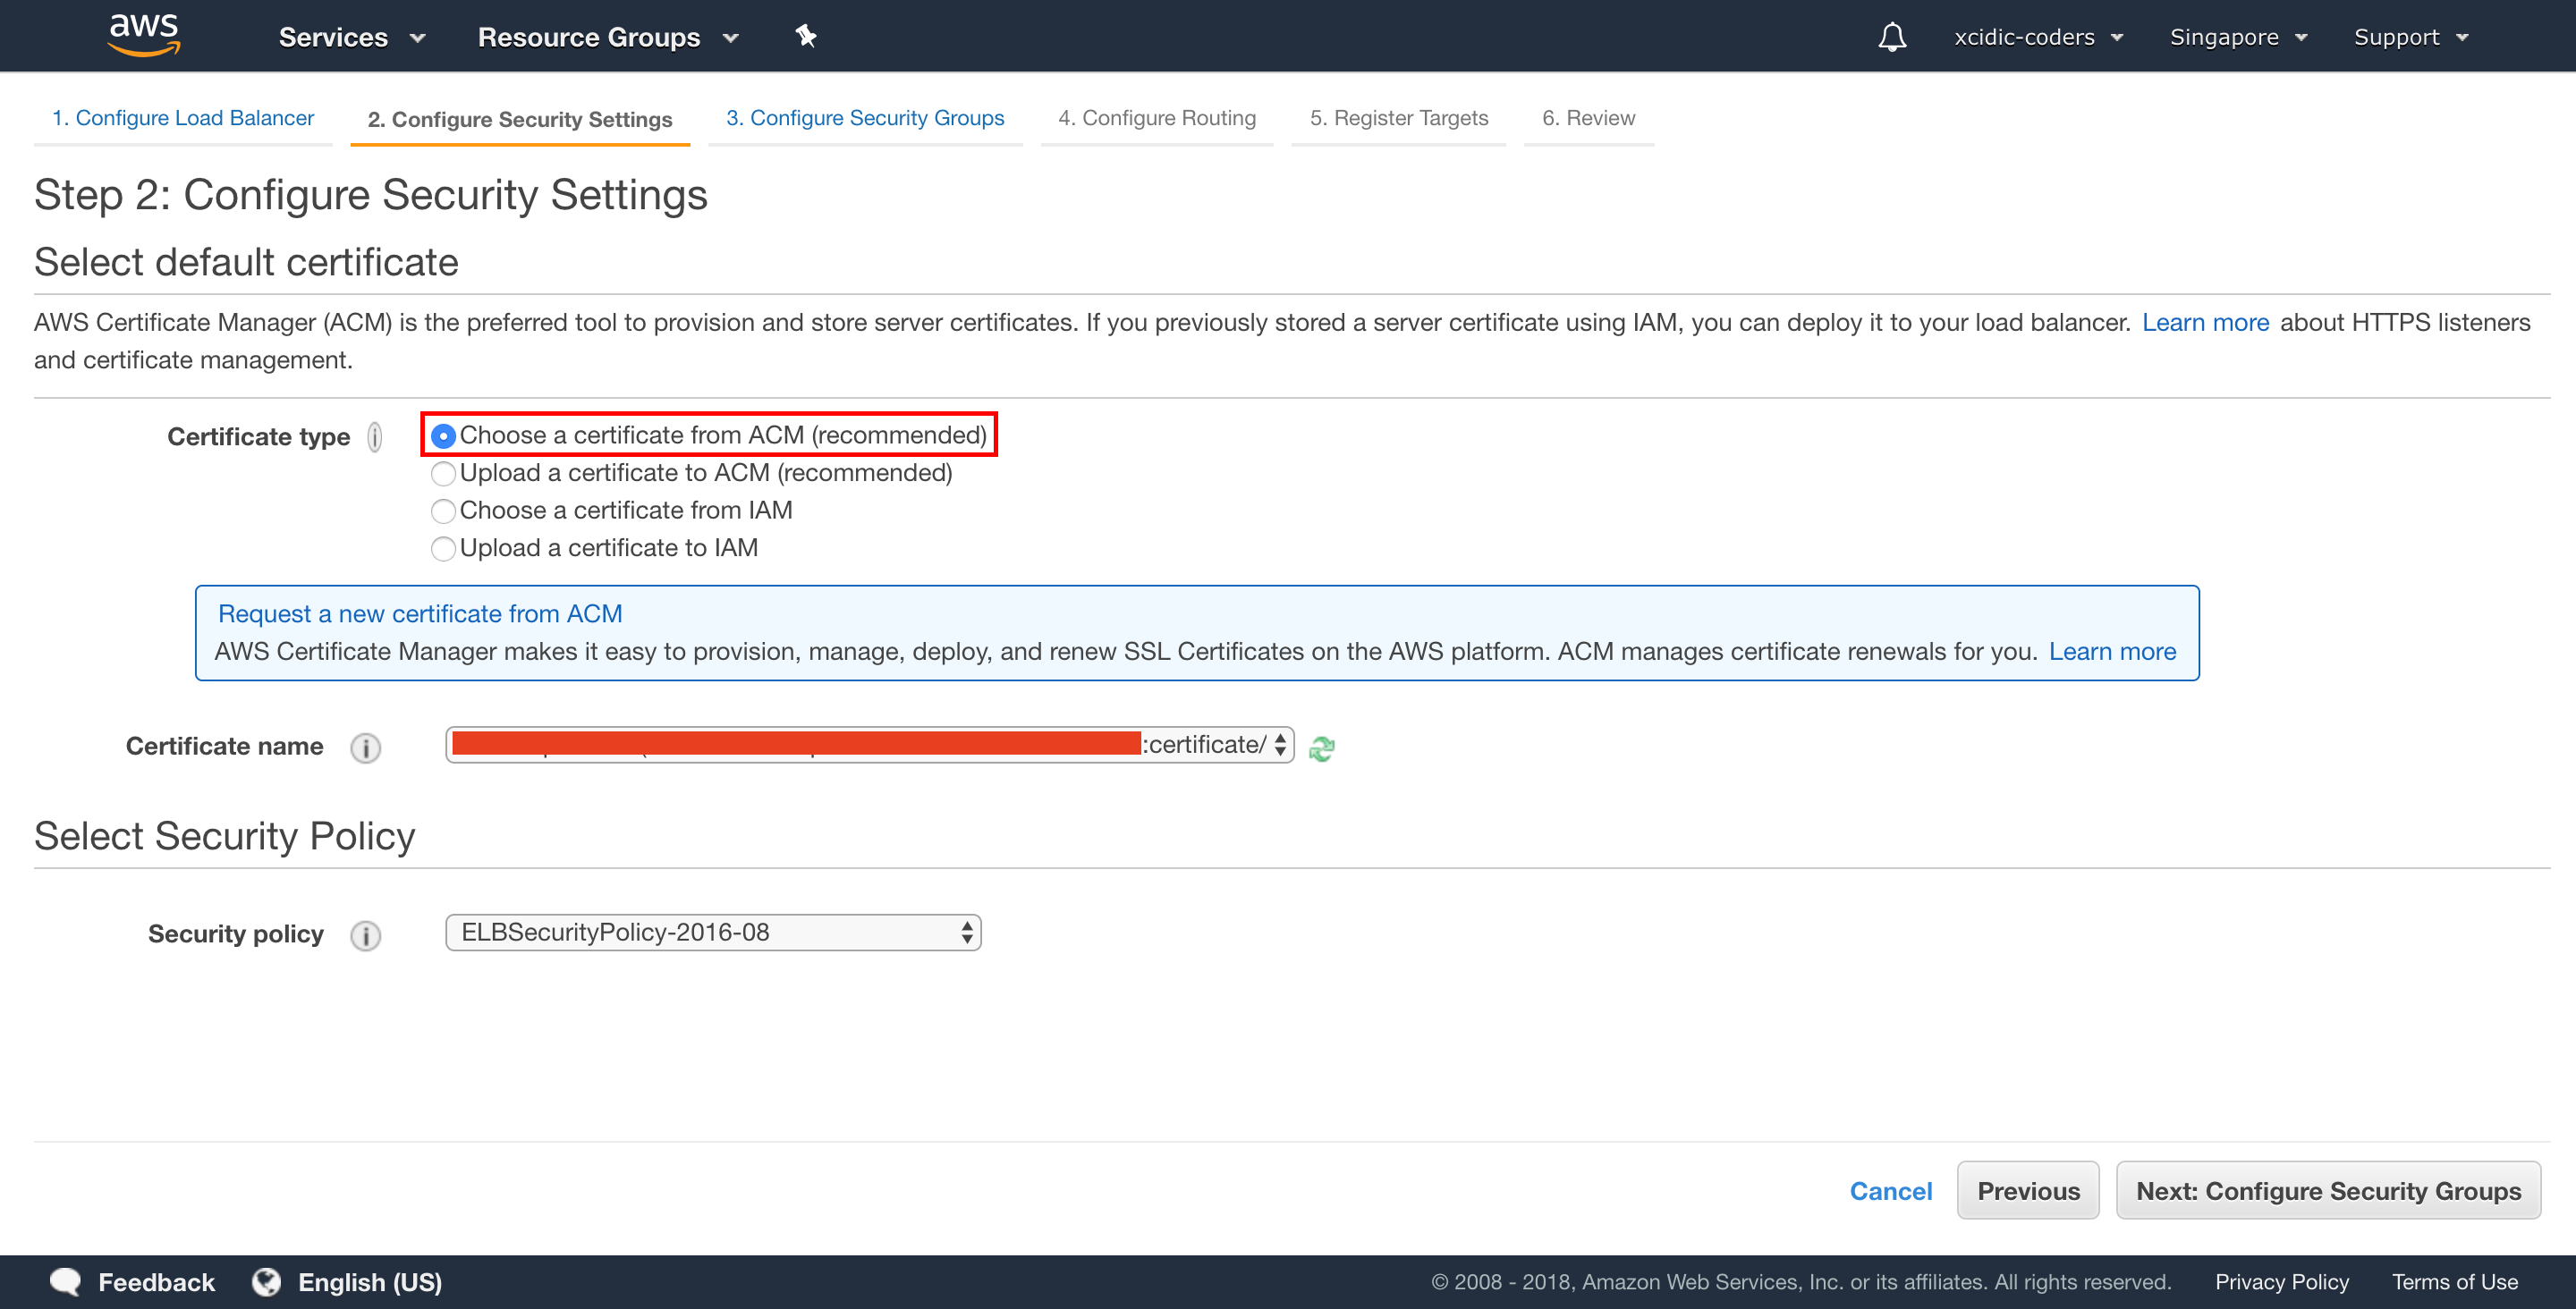
5. Configure Security Settings
Choose our ACM, then click “Next: Configure Security Groups”.
p.s: If there is no ACM yet, you can click this link
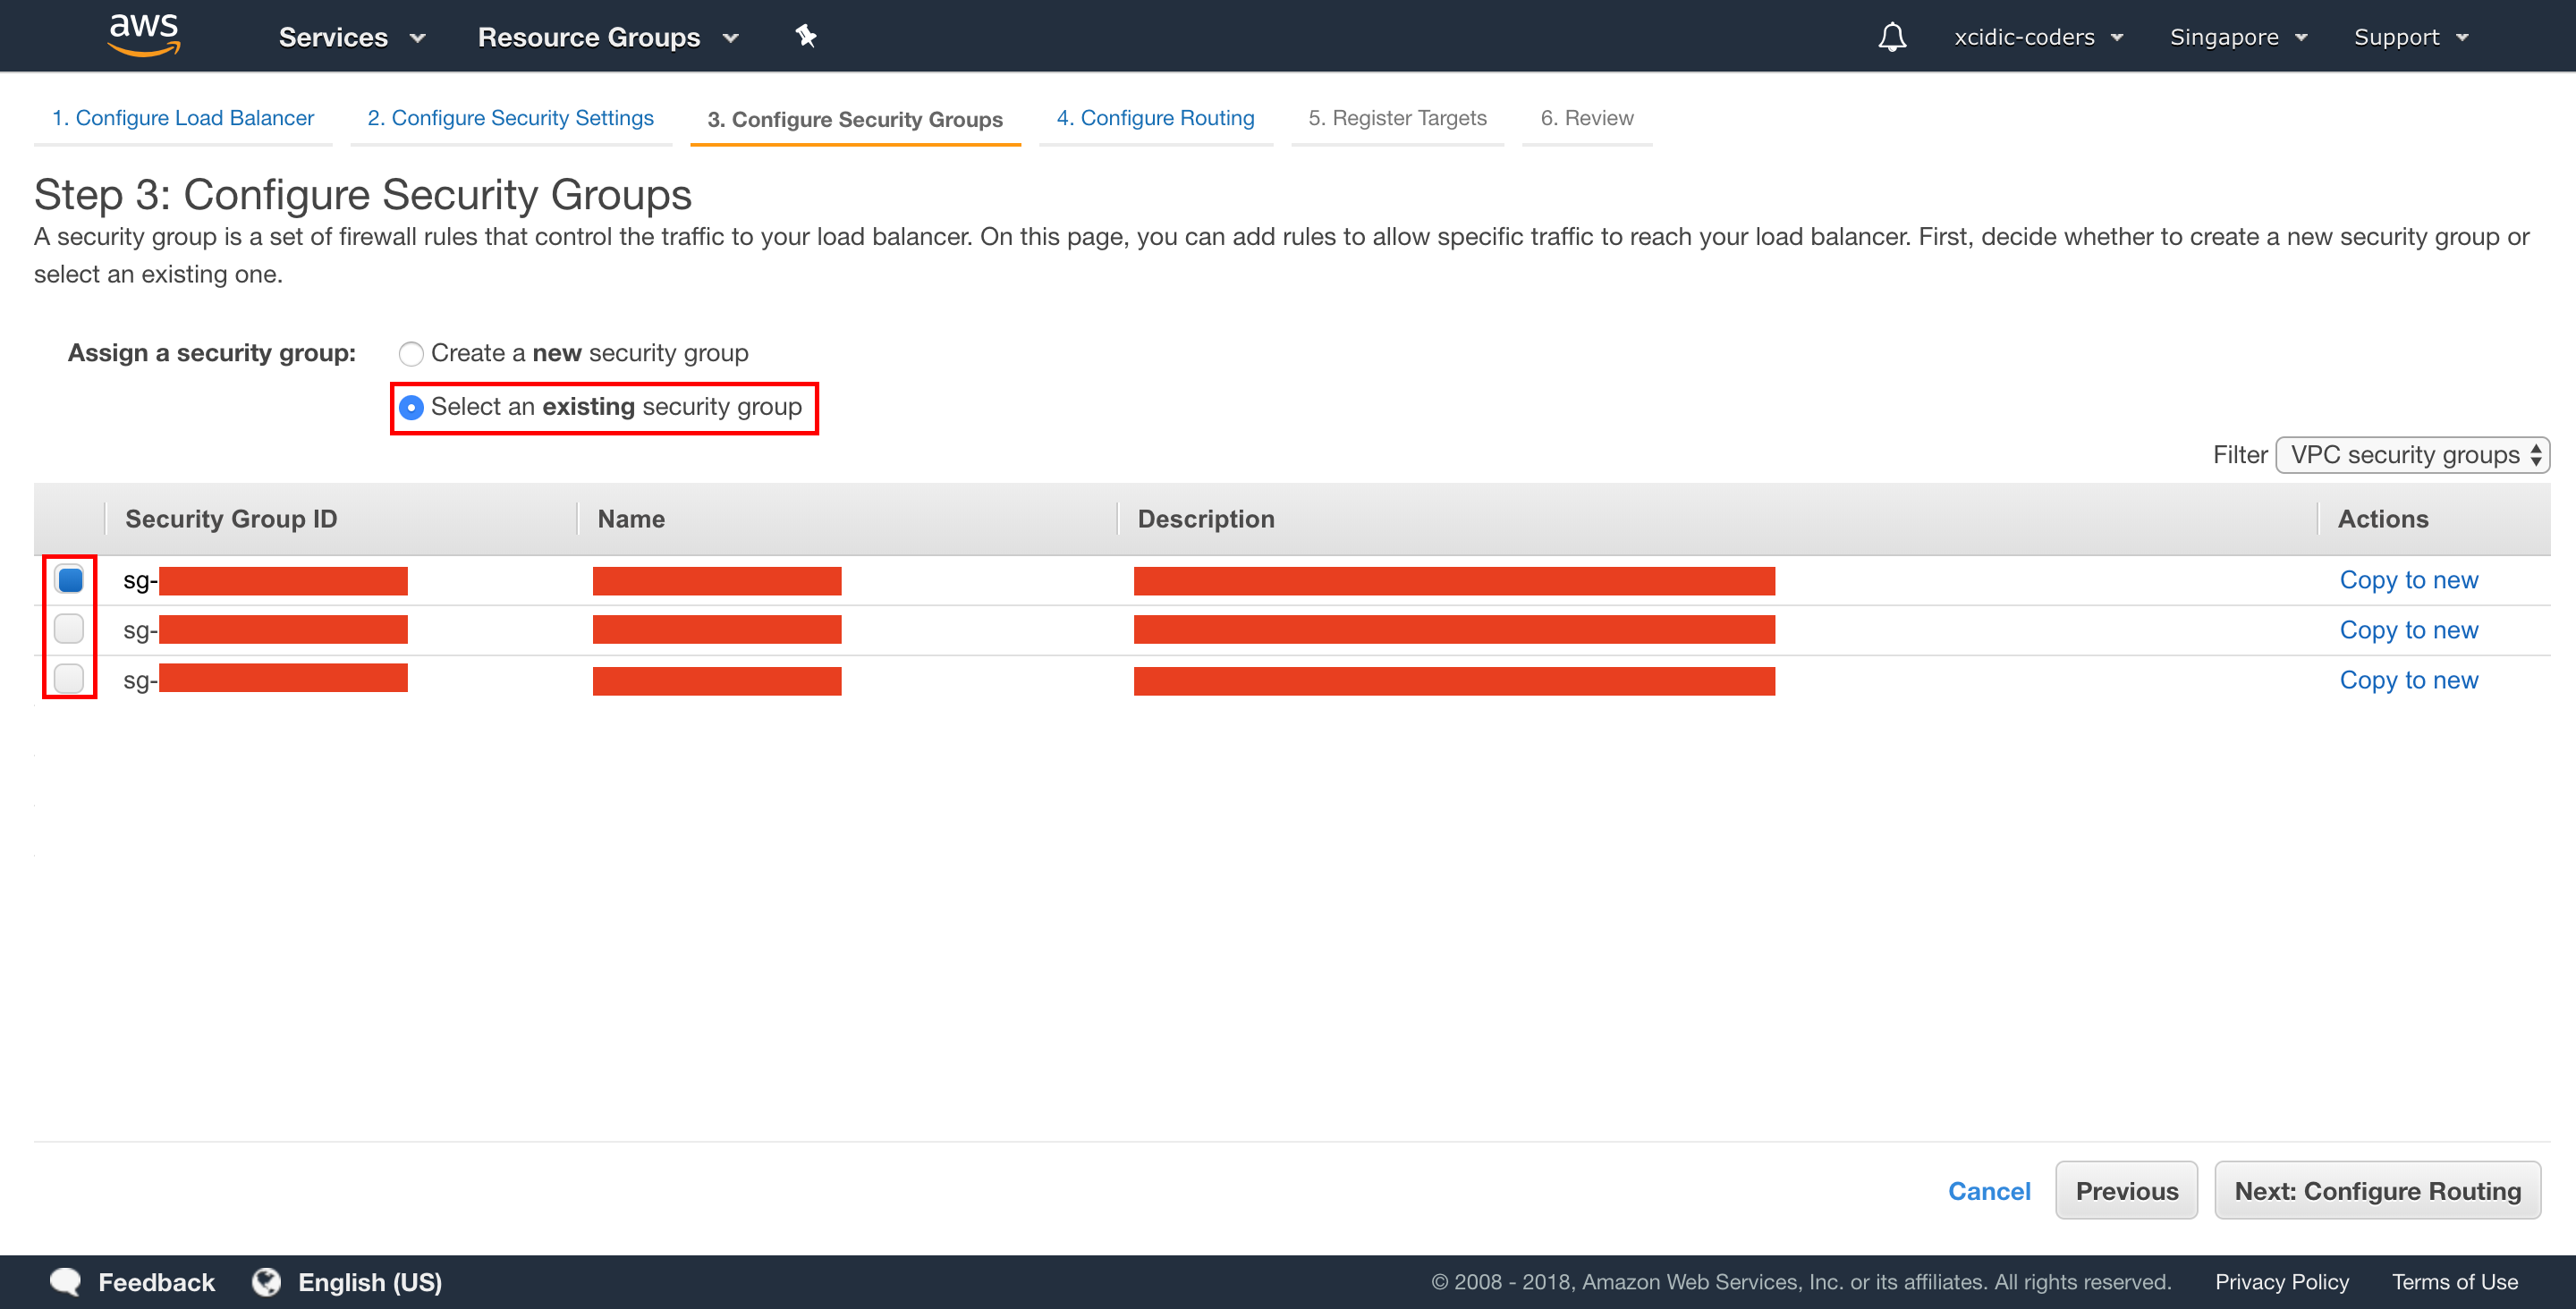
6. Configure Security Groups
Choose Security Groups for Load Balancer, then click “Next: Configure Routing”.
p.s: If there is no Security Groups for Load Balancer yet, you can click this link
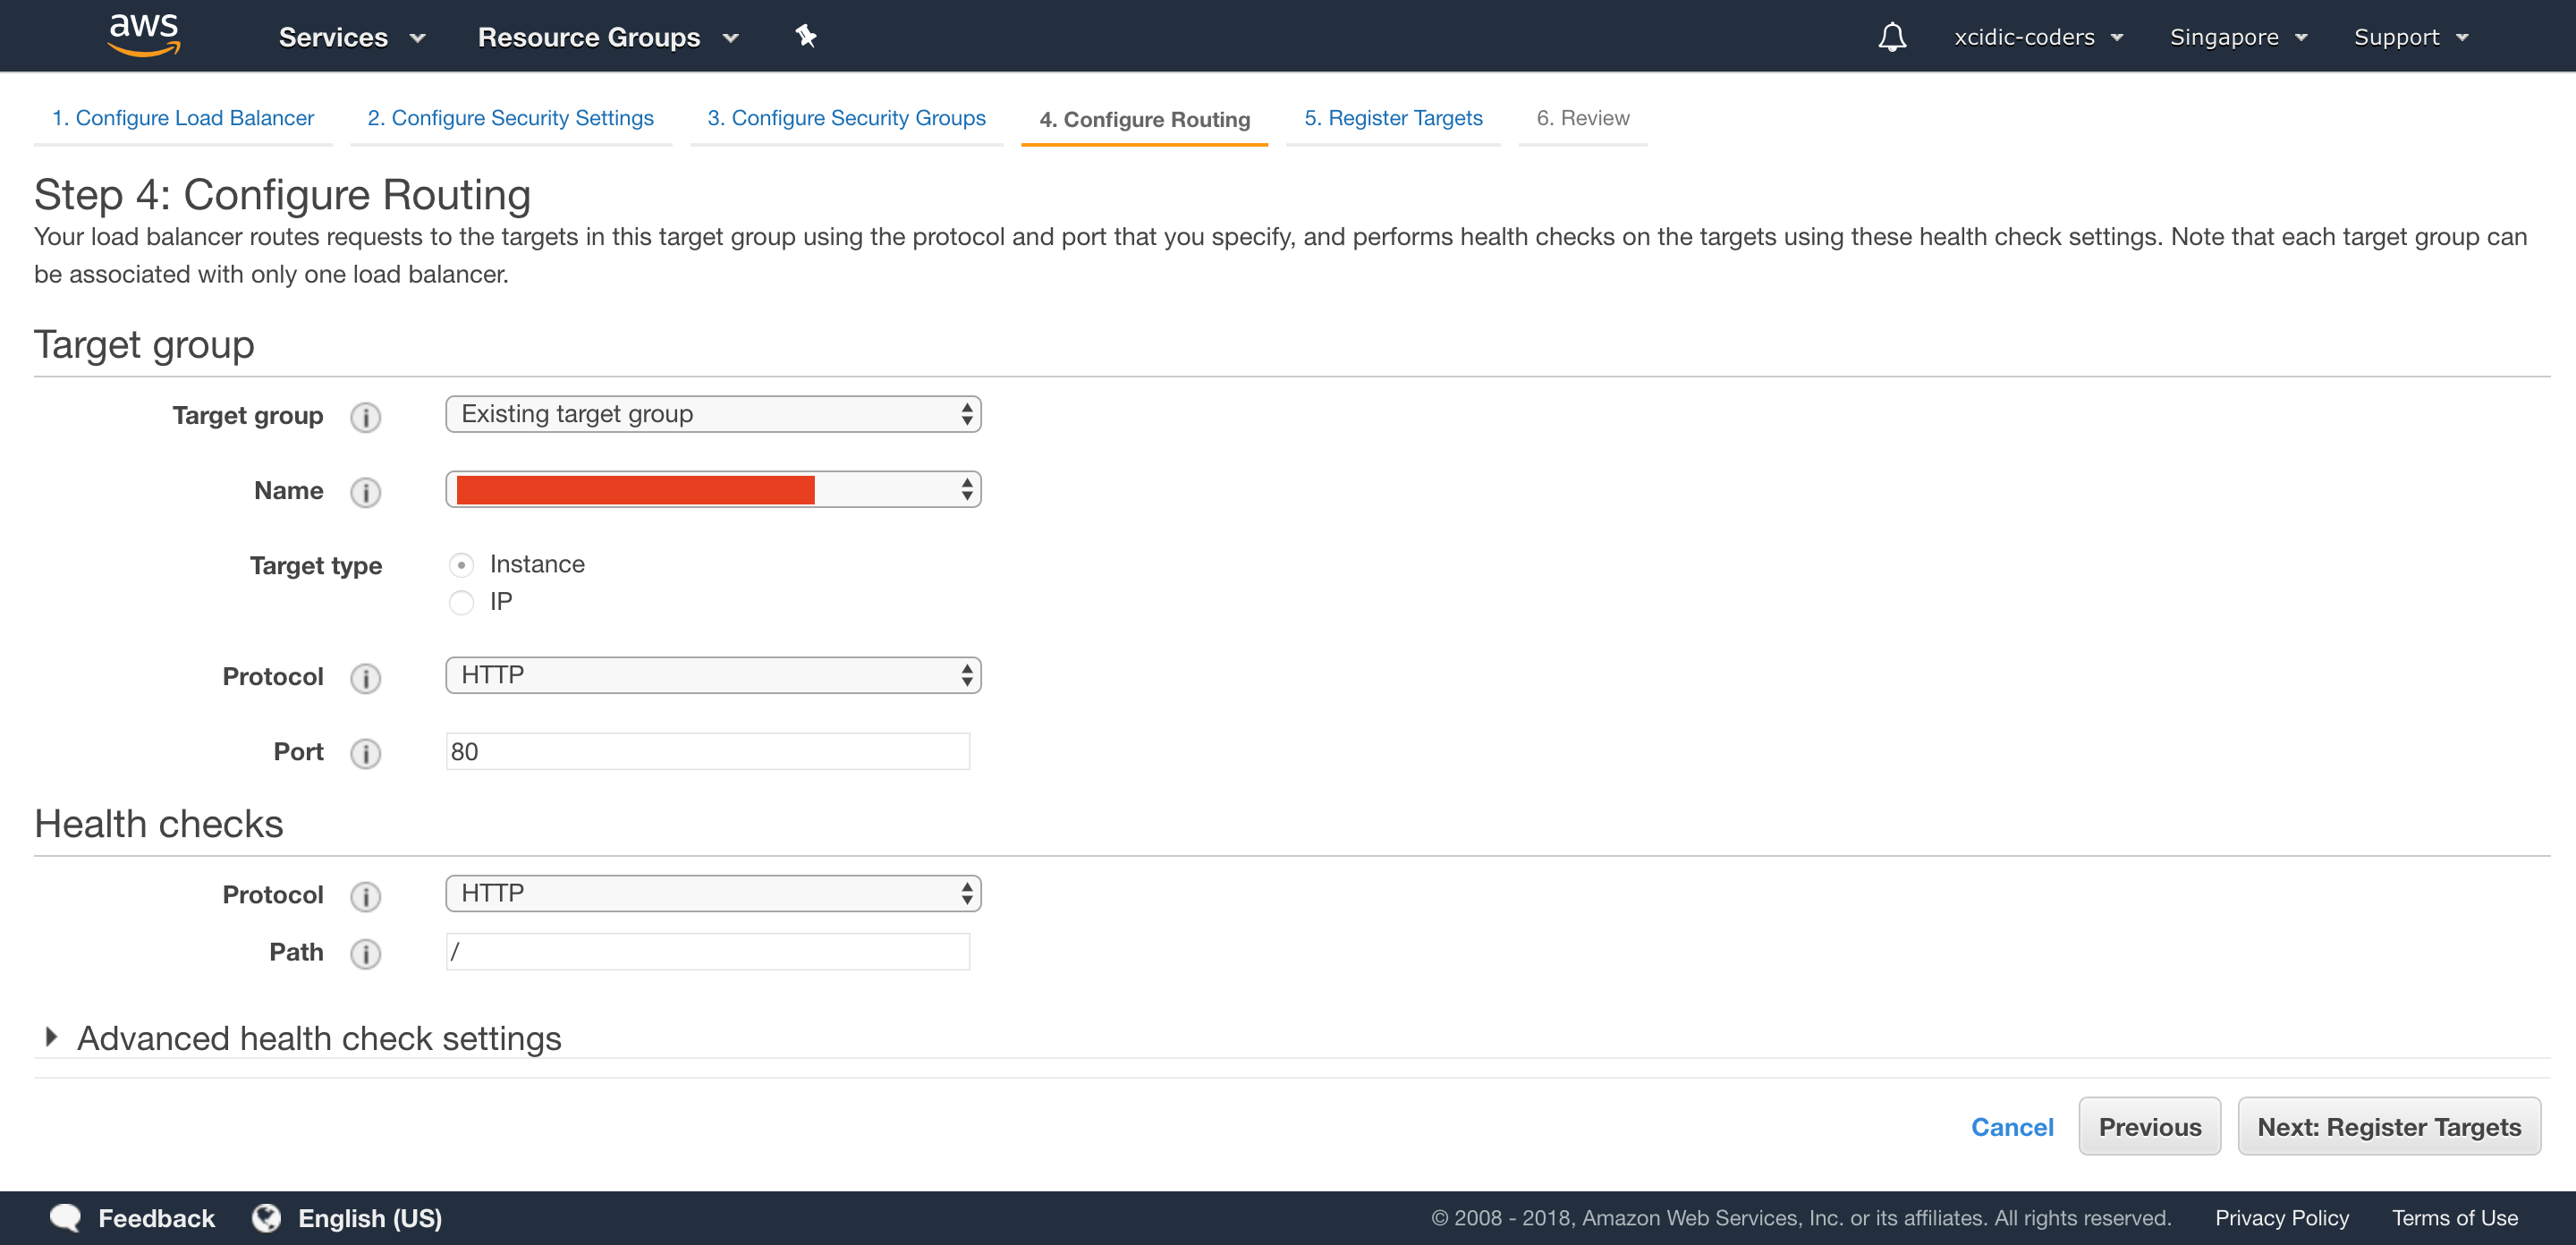
7. Configure Routing
Choose our target group, then click “Next: Register Targets”.
p.s: If there is no target group yet, you can click this link
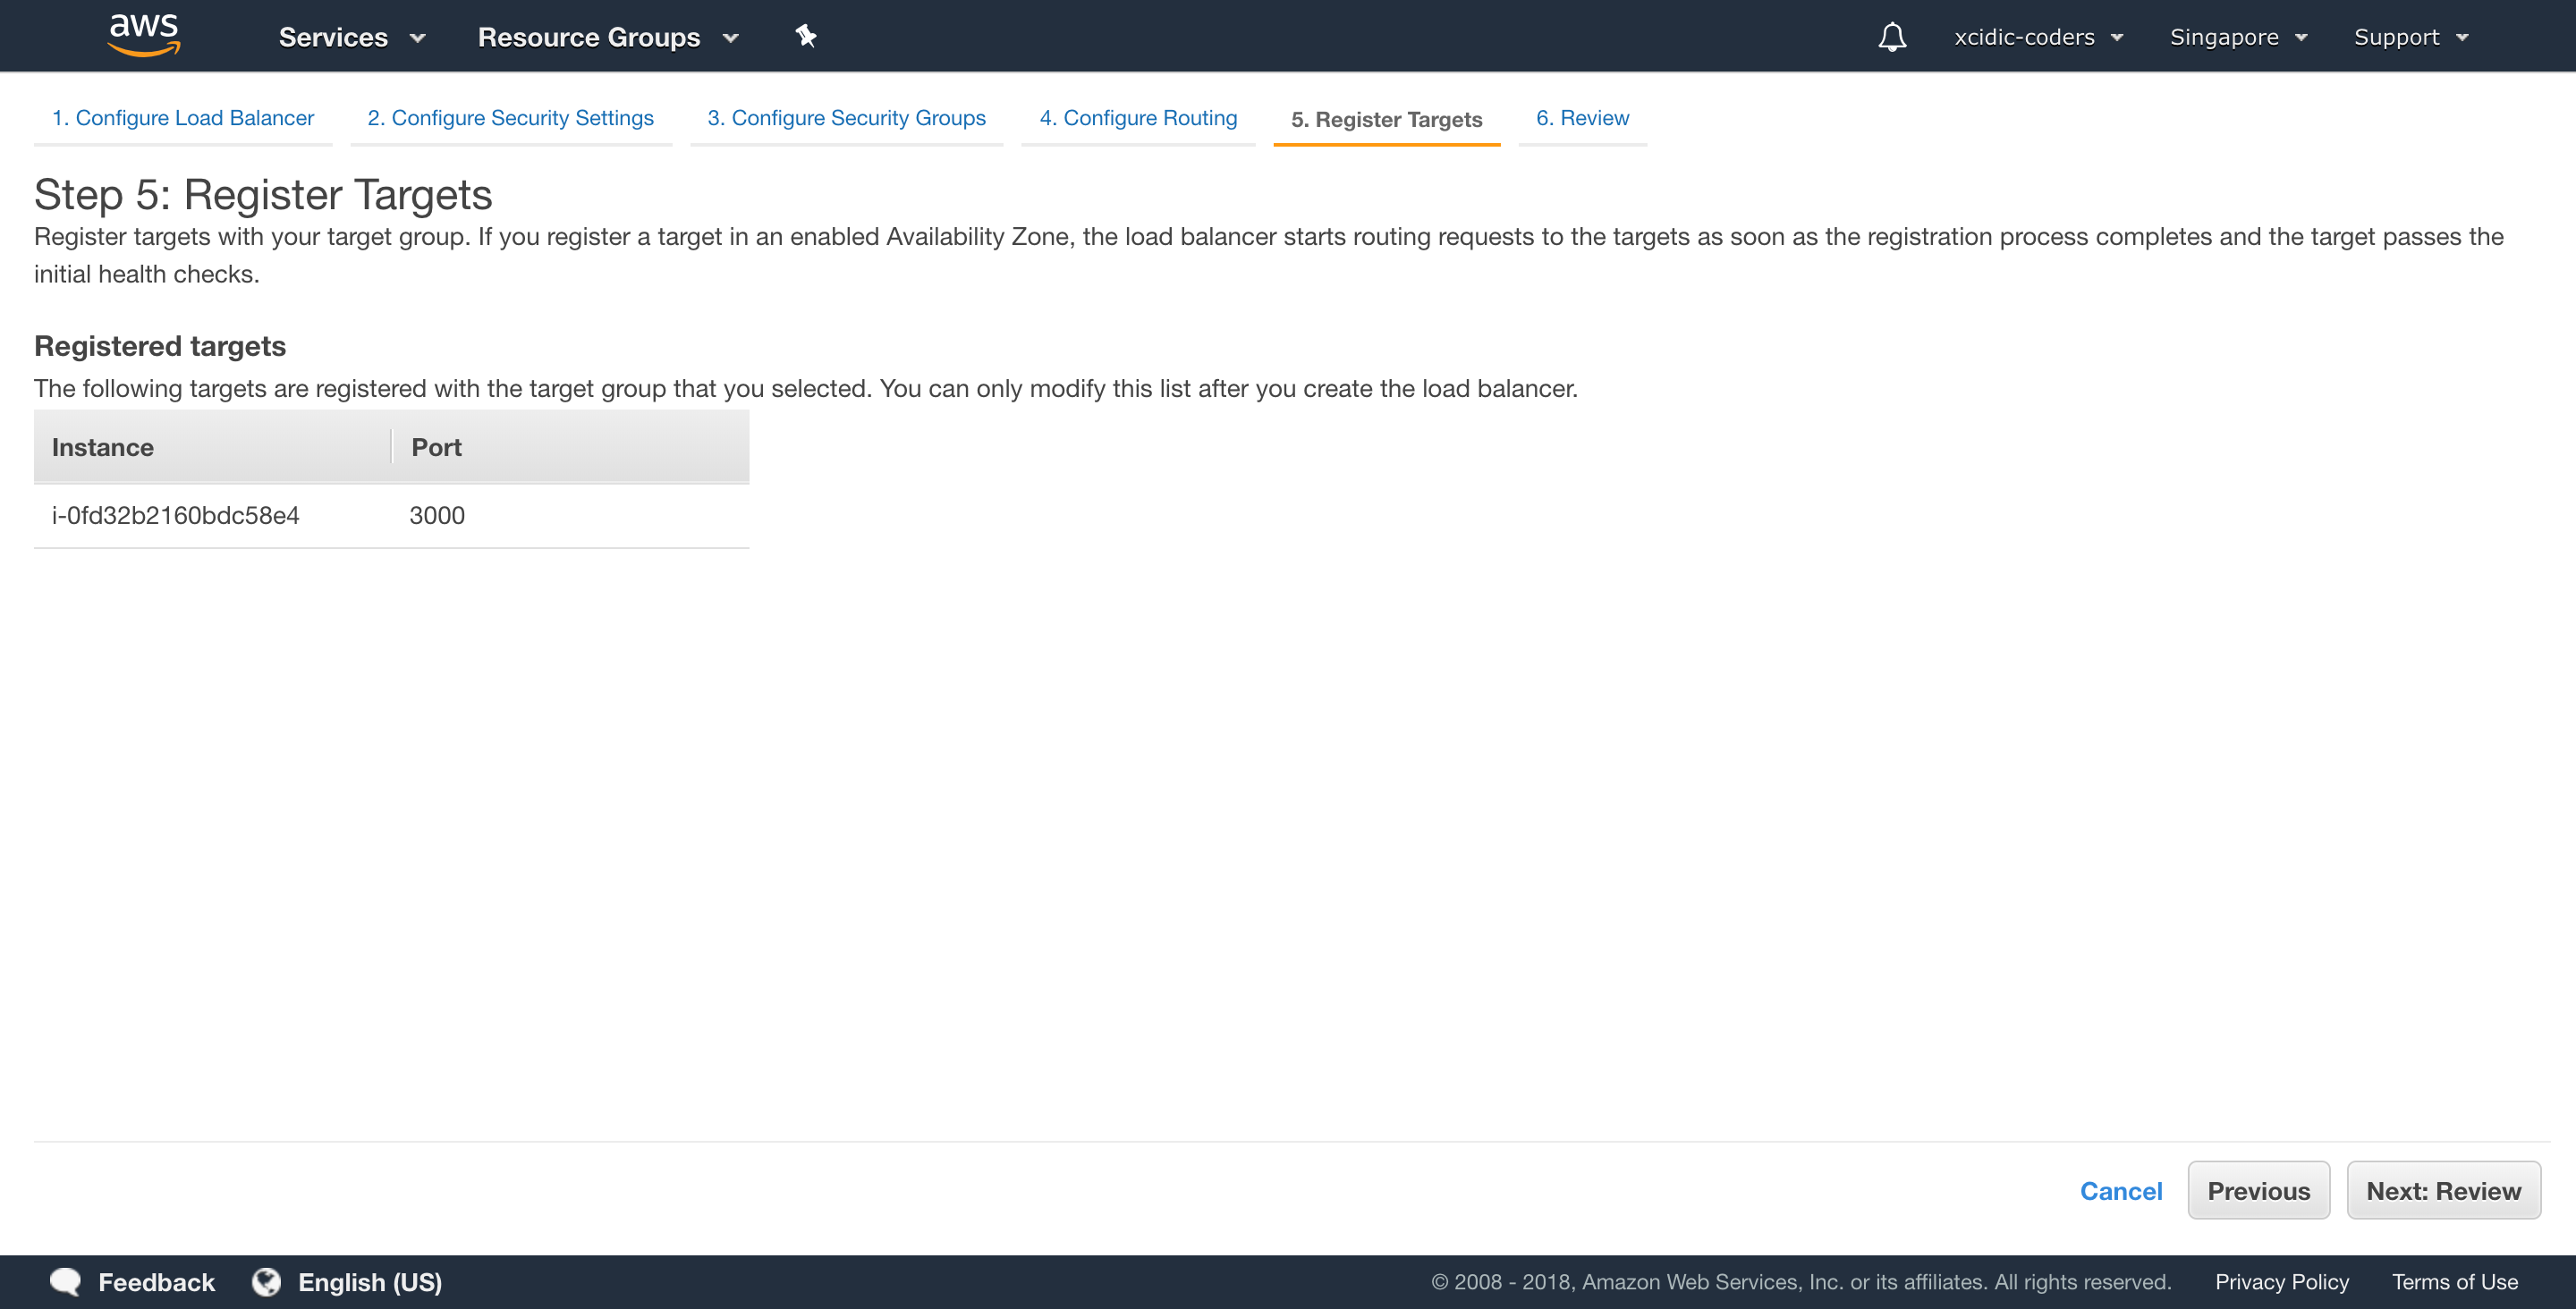
8. Register Targets
Review our register targets, then click “Next: Review”.
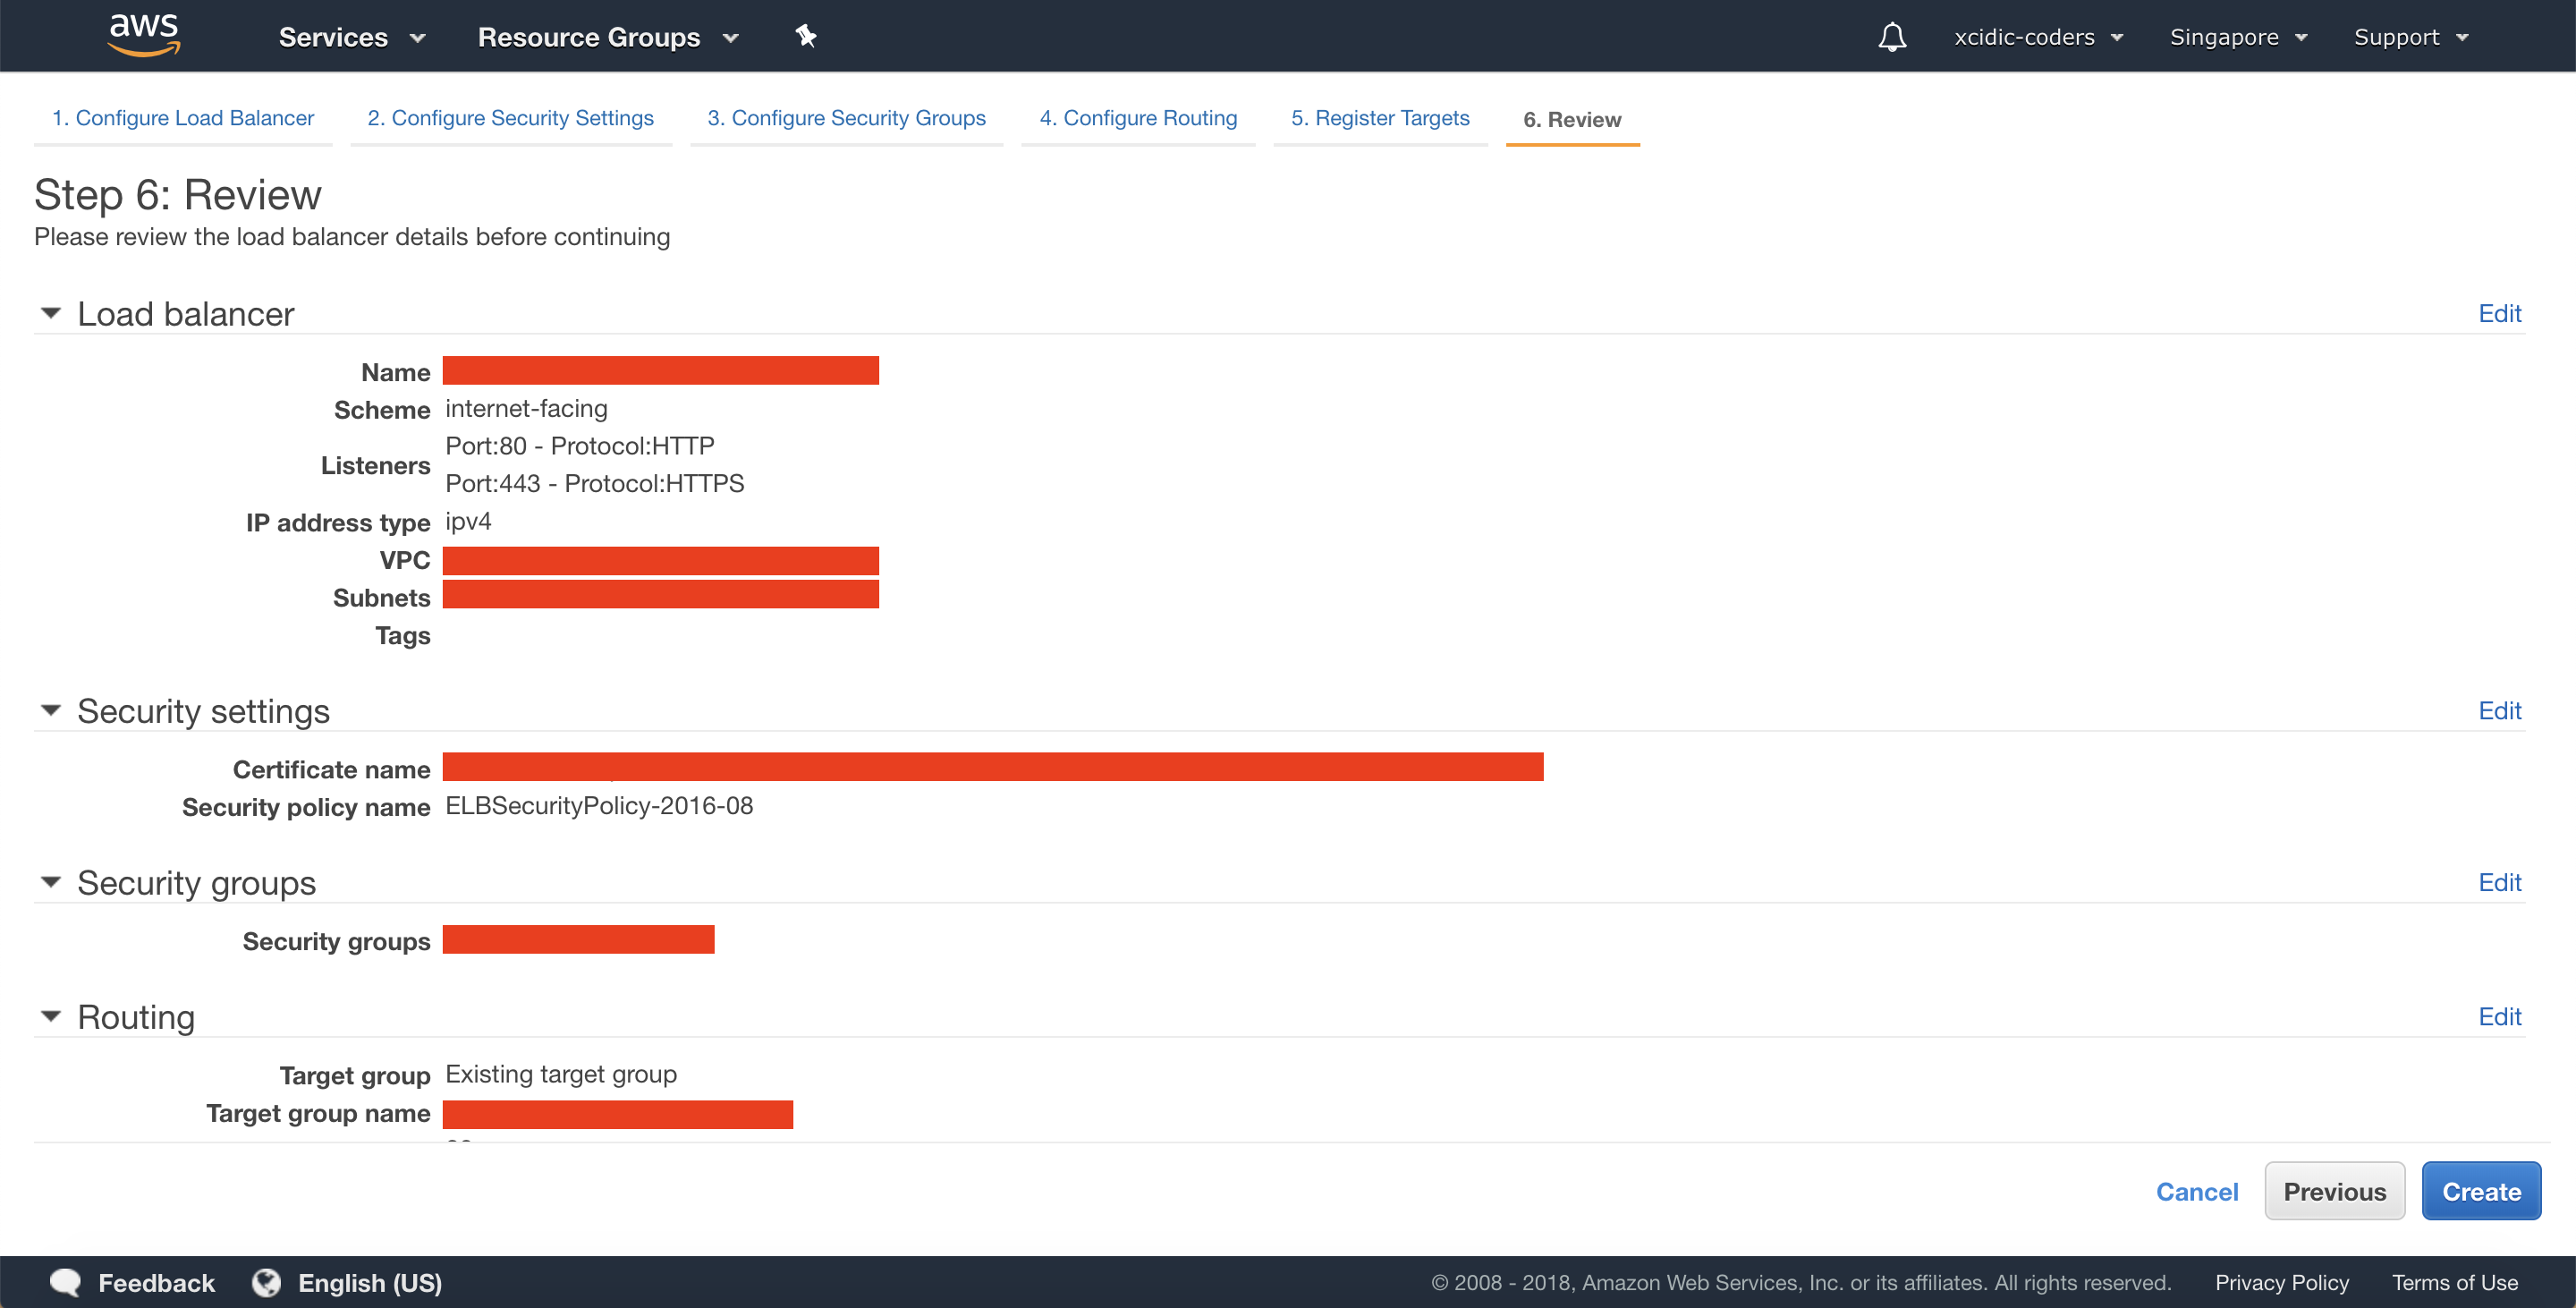
9. Review
Review our load balancer, then click “Create”.